ICM Final – Humanizing Performance art

The key ingredient in performance art of any kind is the human performer. For our ICM final, Lisa Jamhoury and myself would like to use computational media to better translate the action and emotion of a performer to his or her audience. This goal is part of a bigger project that Lisa, Danielle Butler and myself have dreamed up whose focus is for an aerial performance. We would like to draw an audience closer to an aerial performer, and to do so outside the confides of a traditional performance space.

FullSizeRender 4

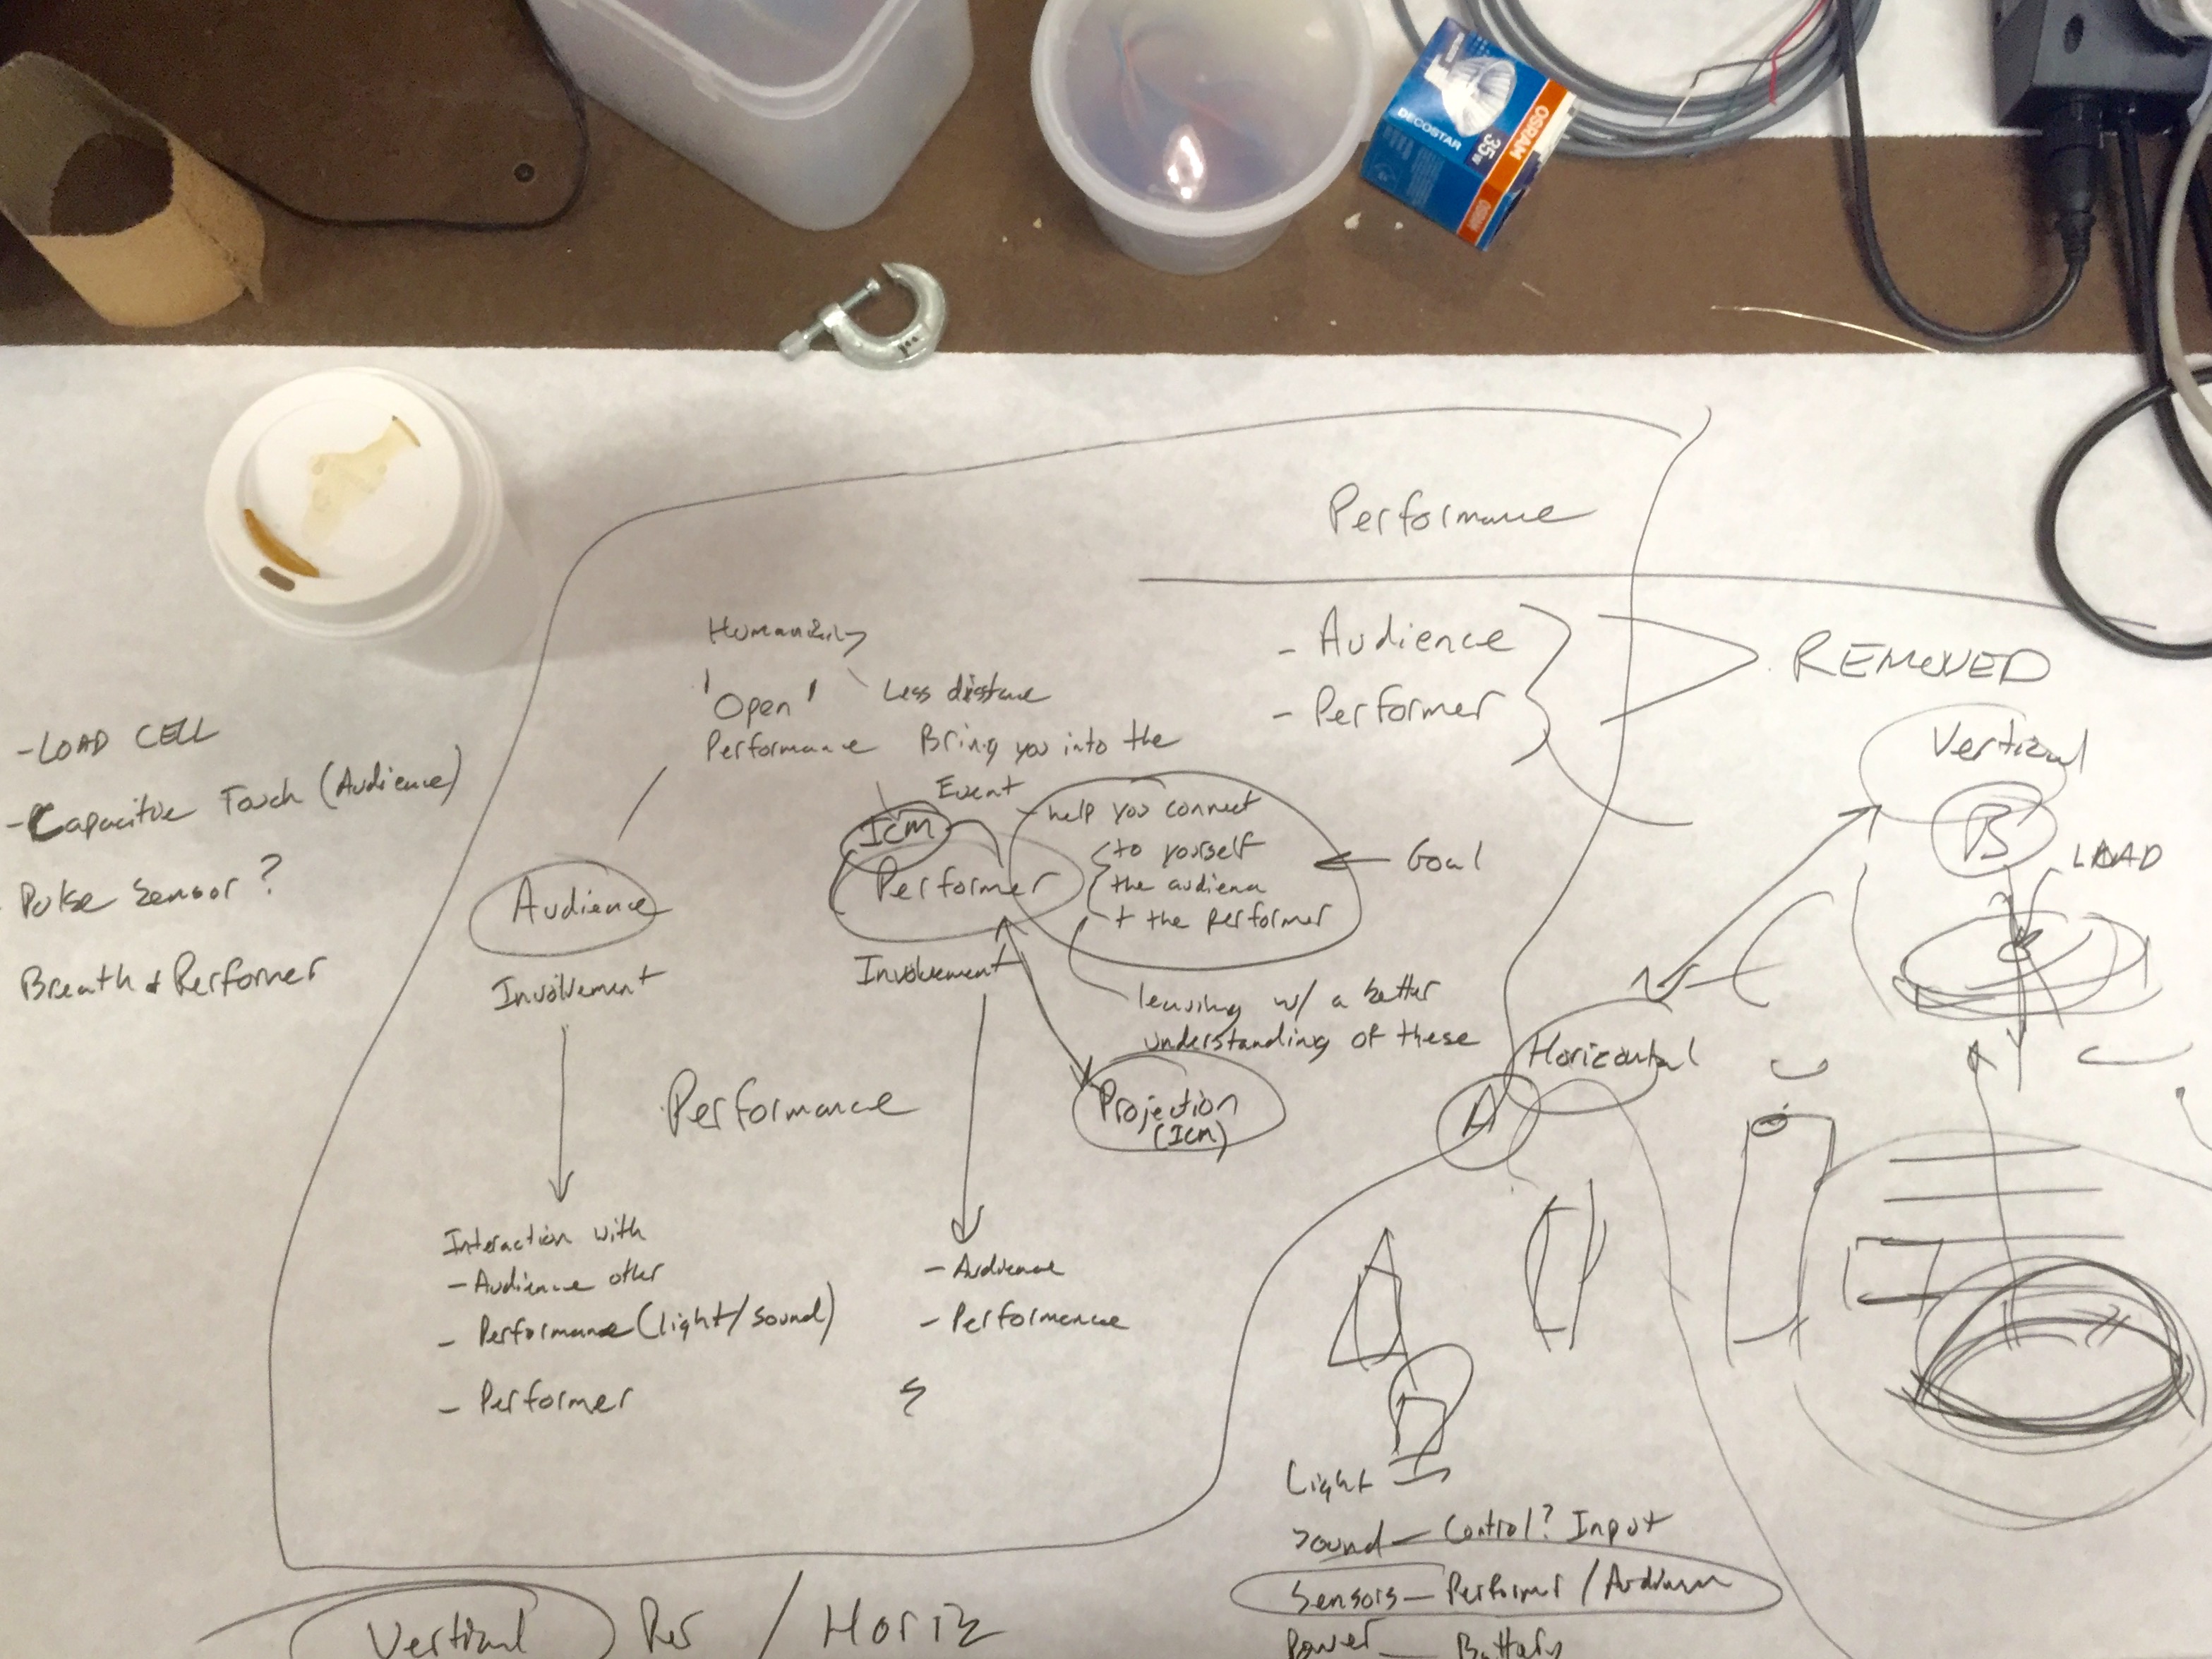
Every idea starts with chicken scratches (and coffee)

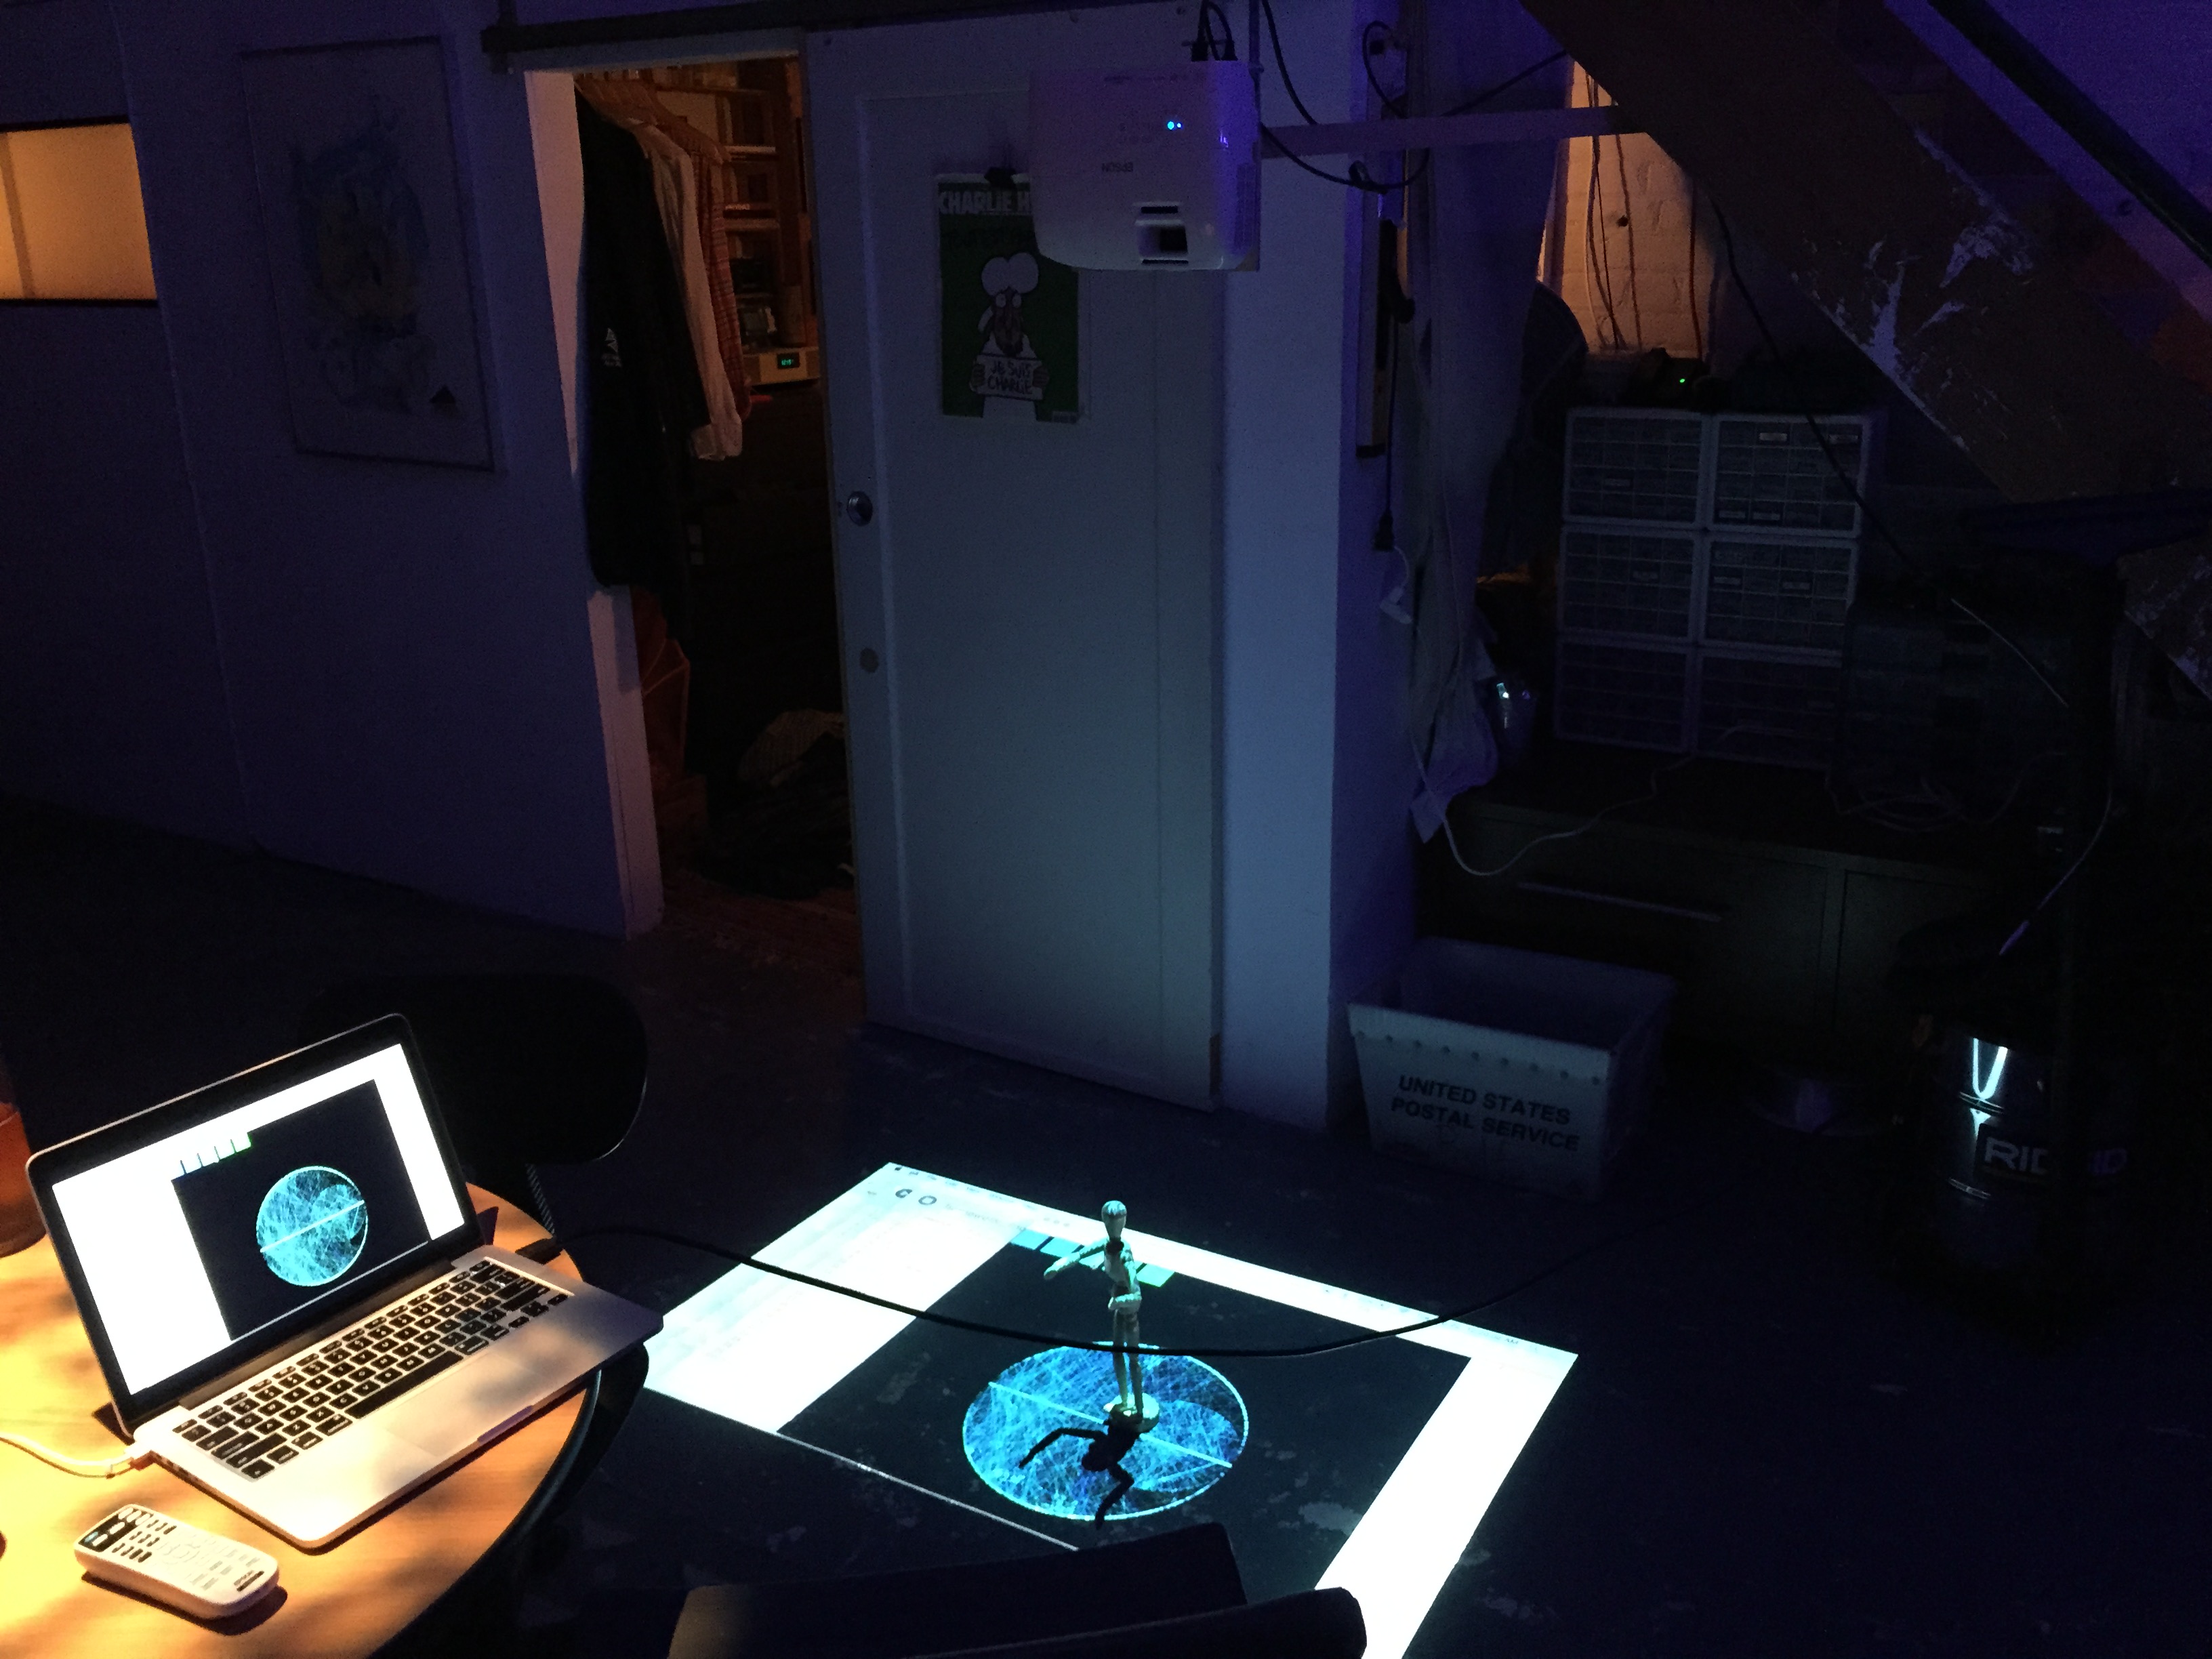
The part of this project we will be executing in ICM will be projected visuals that are manipulated by sensors placed on the performer and the arial apparatus, and possibly ones on/directed to the audience.

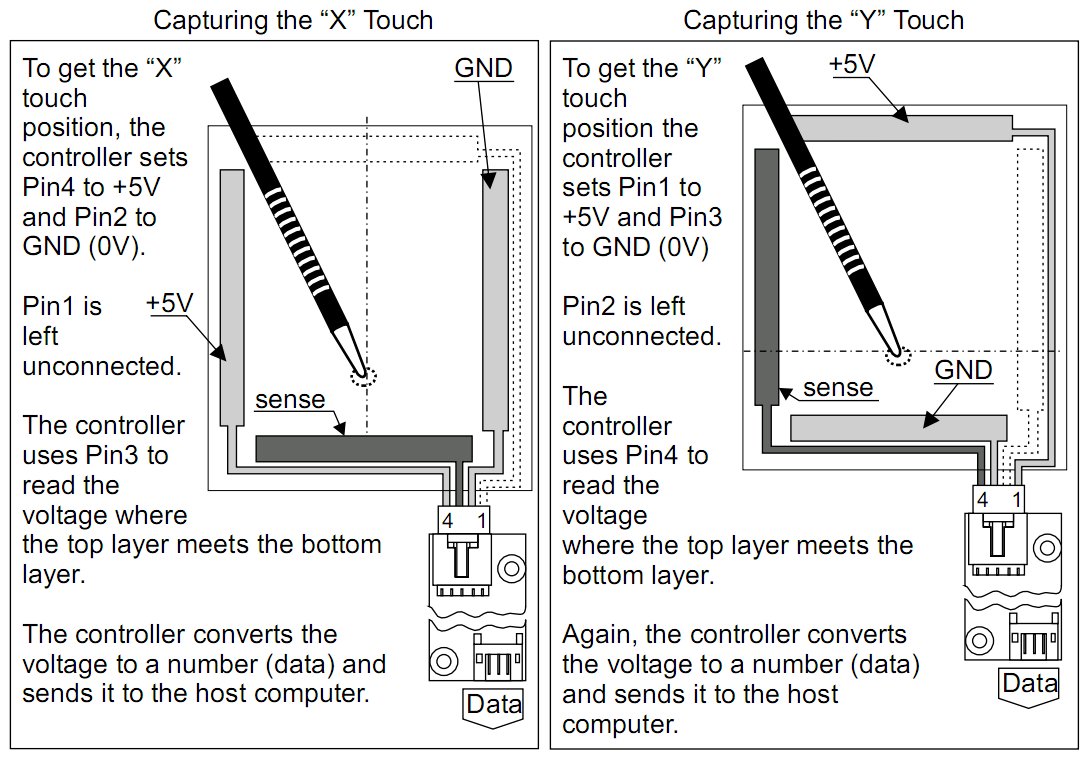
My goal is to only use physical inputs that will produce definite translations. I think using inputs that we can fully count on and coding them work as fluid as possible is key. (I’m not sold on the xbox kinect).

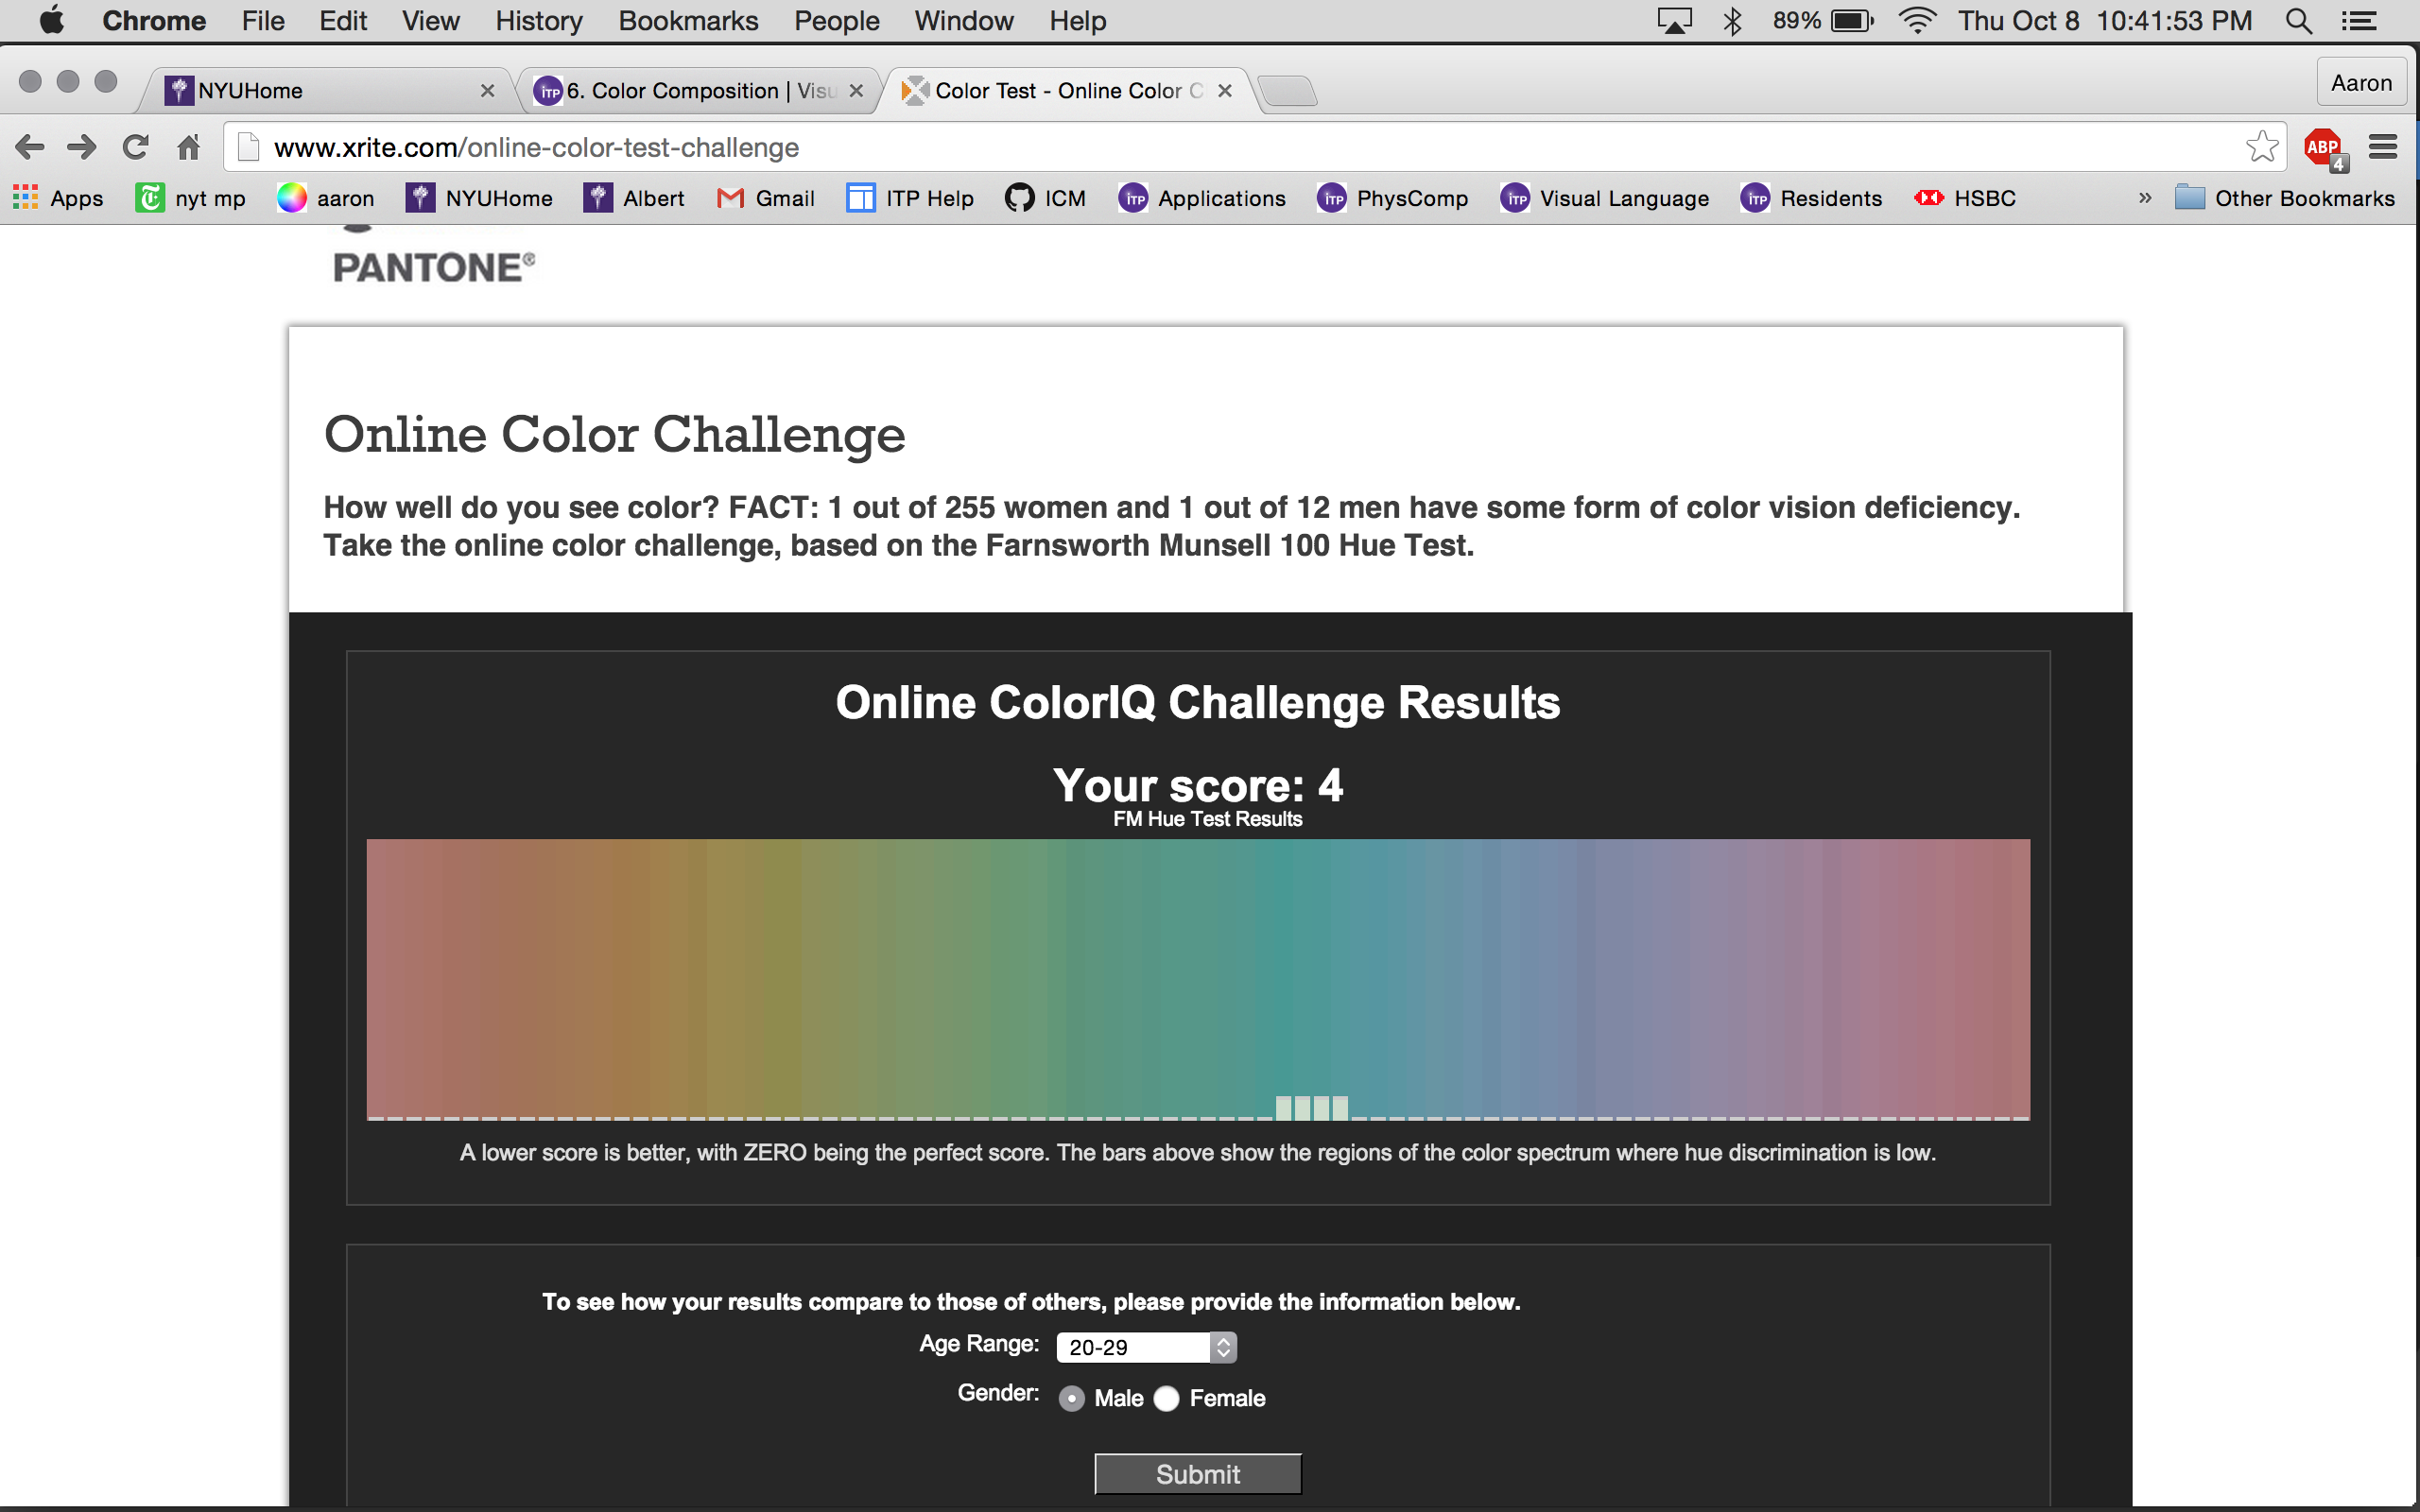
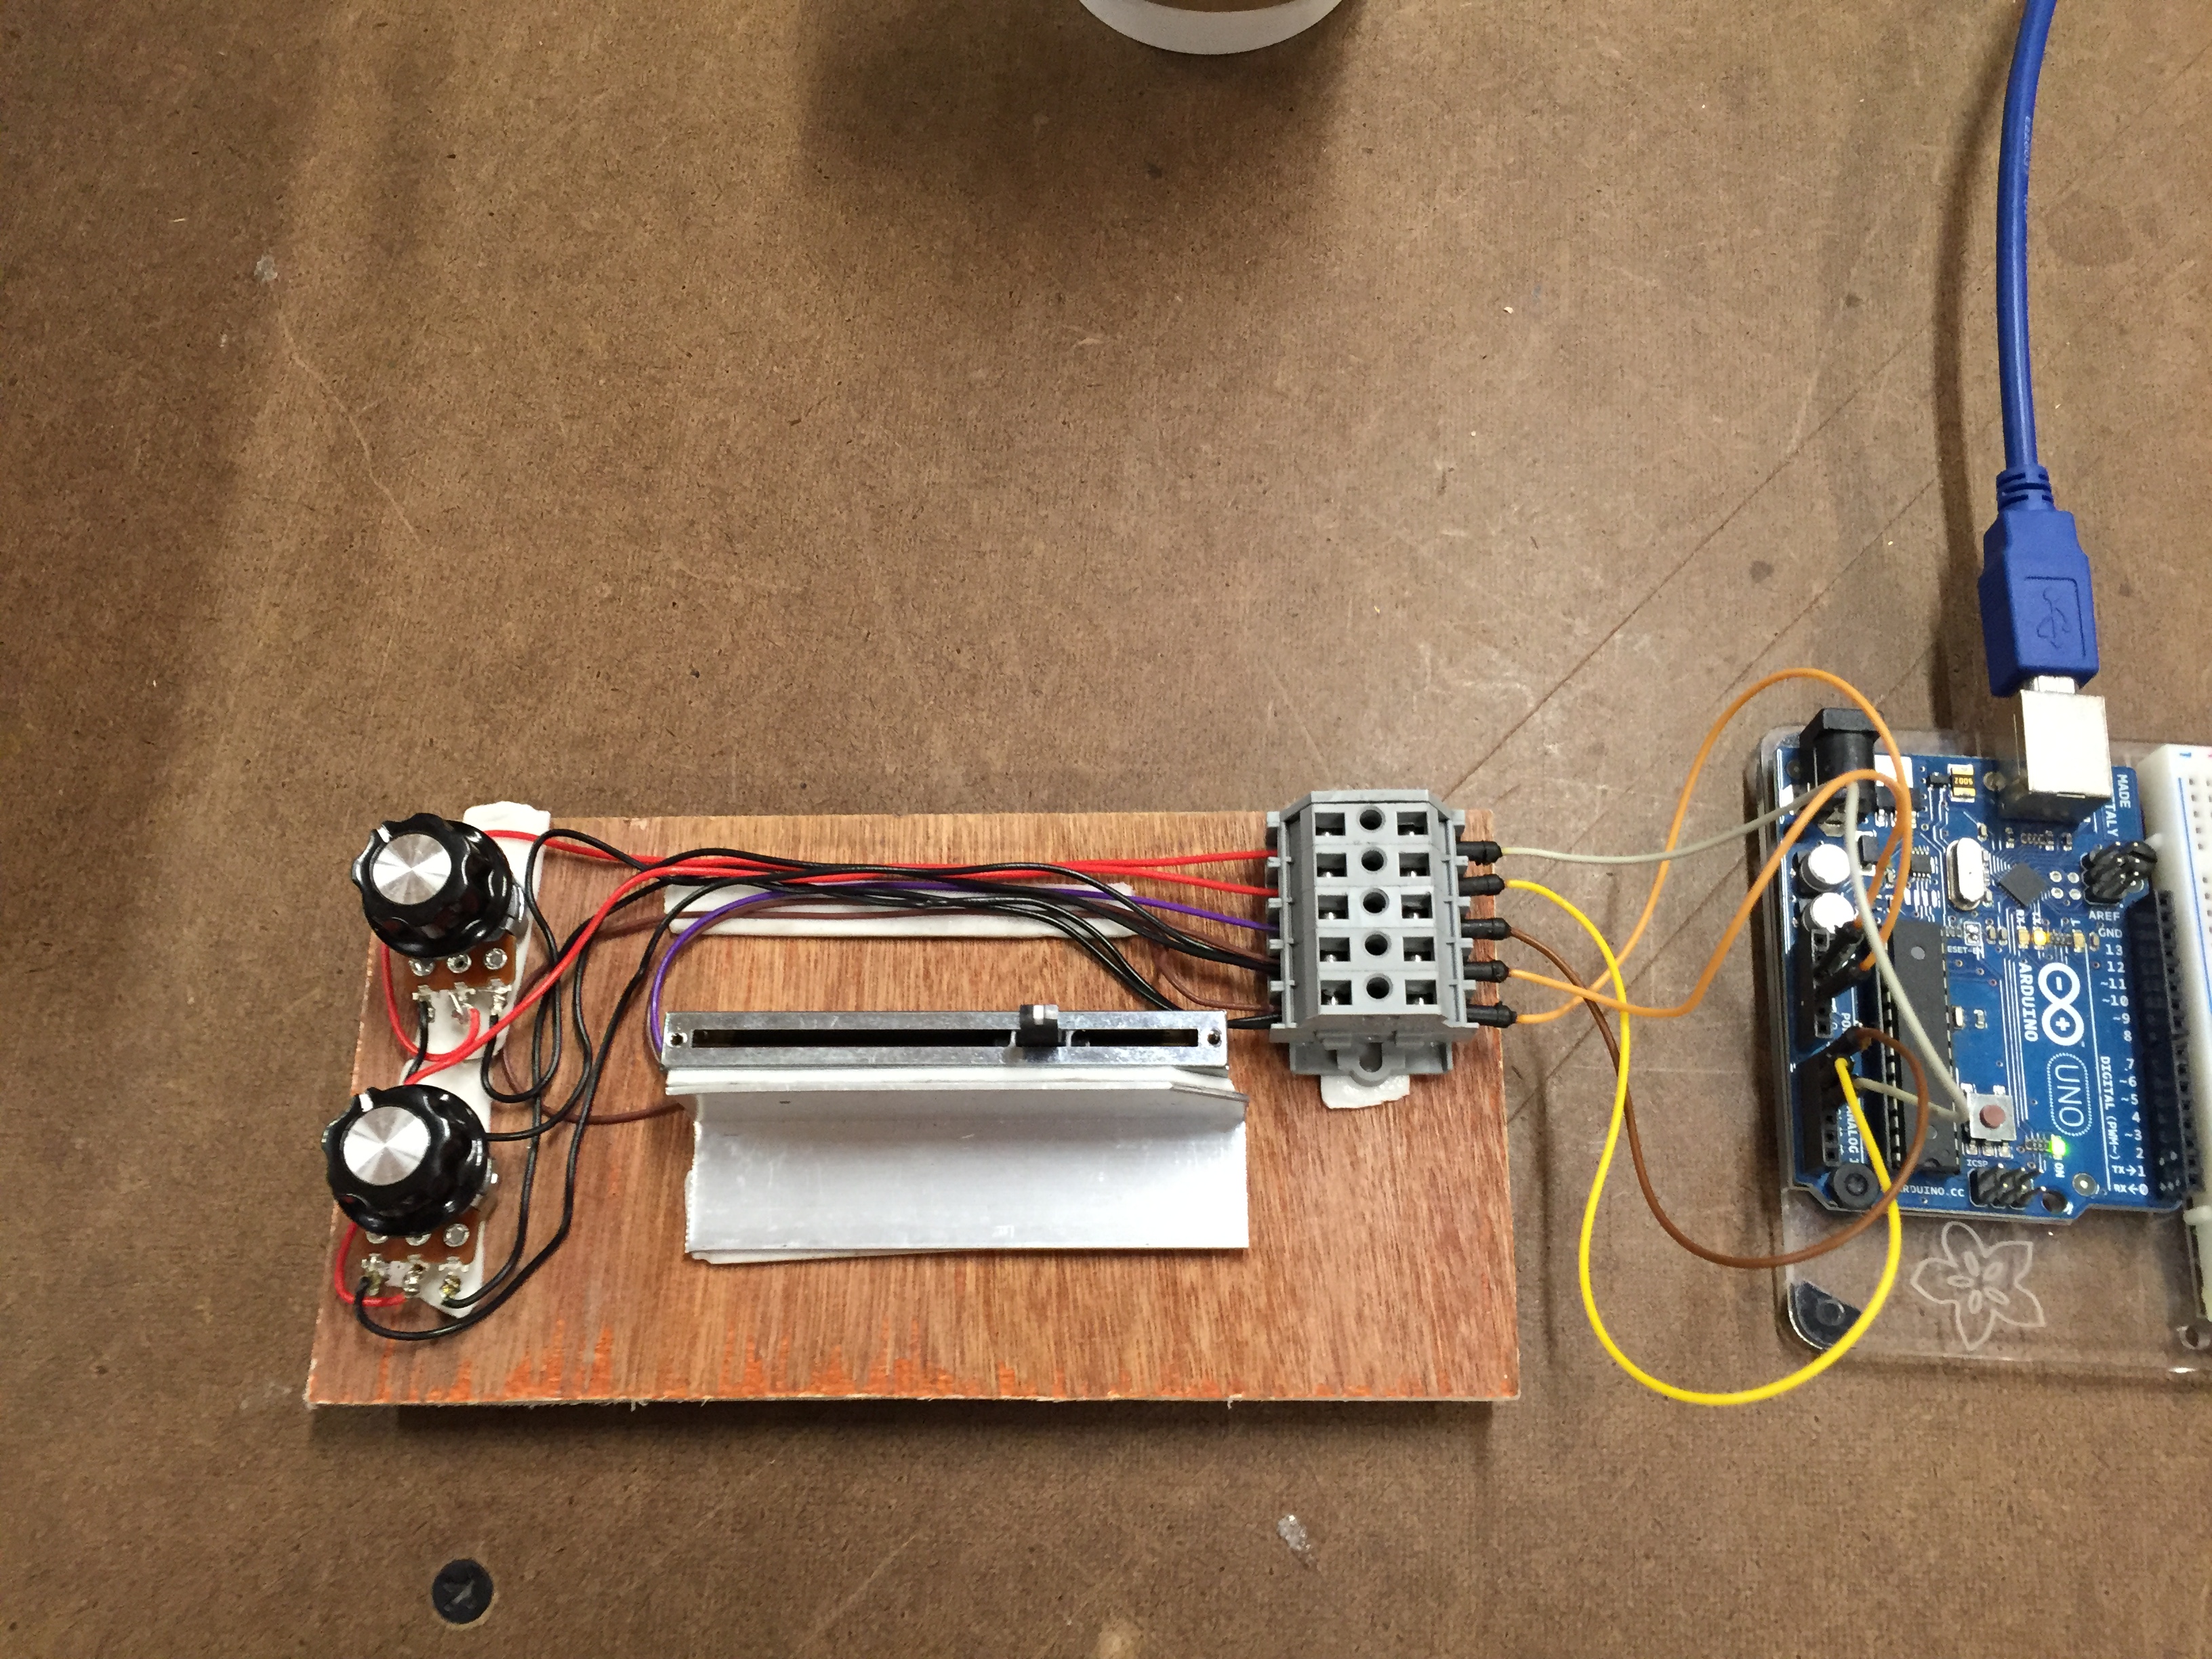
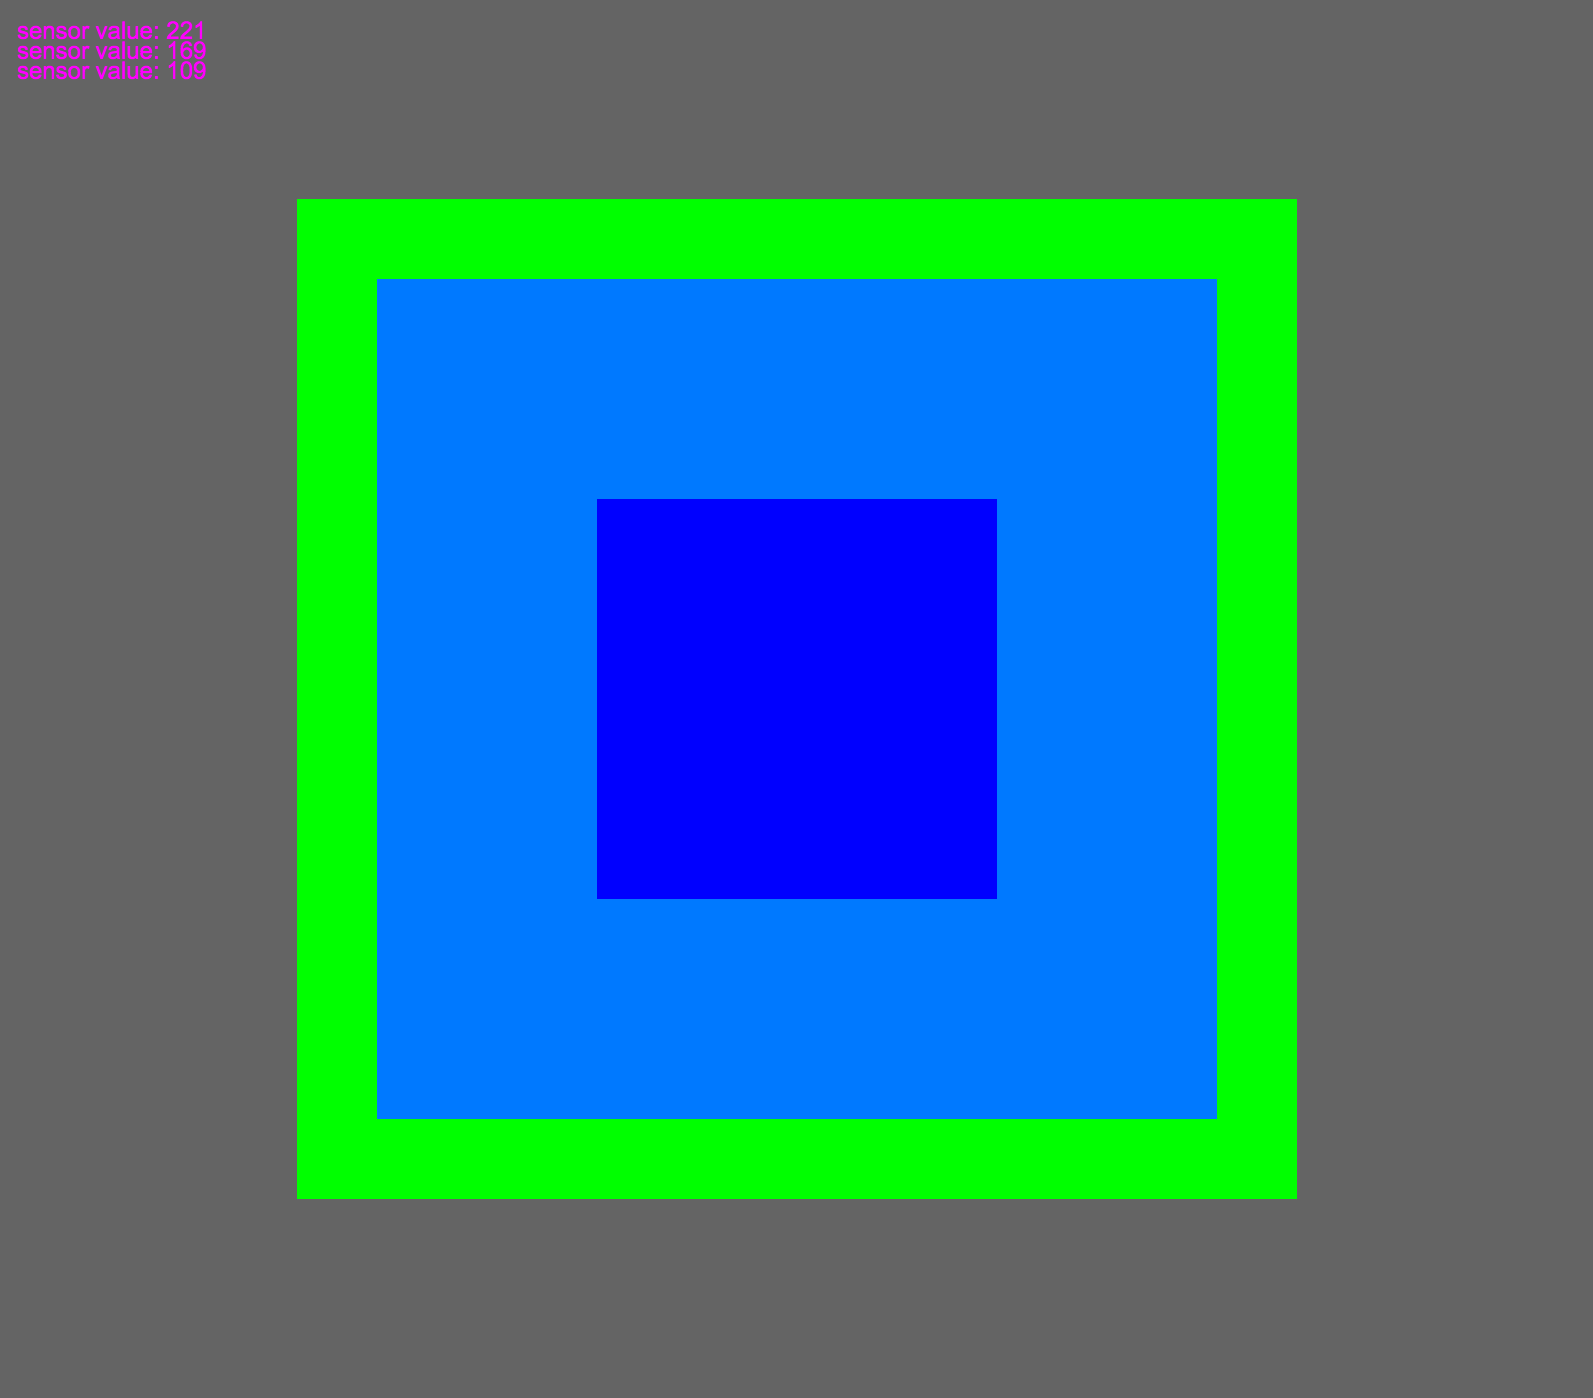
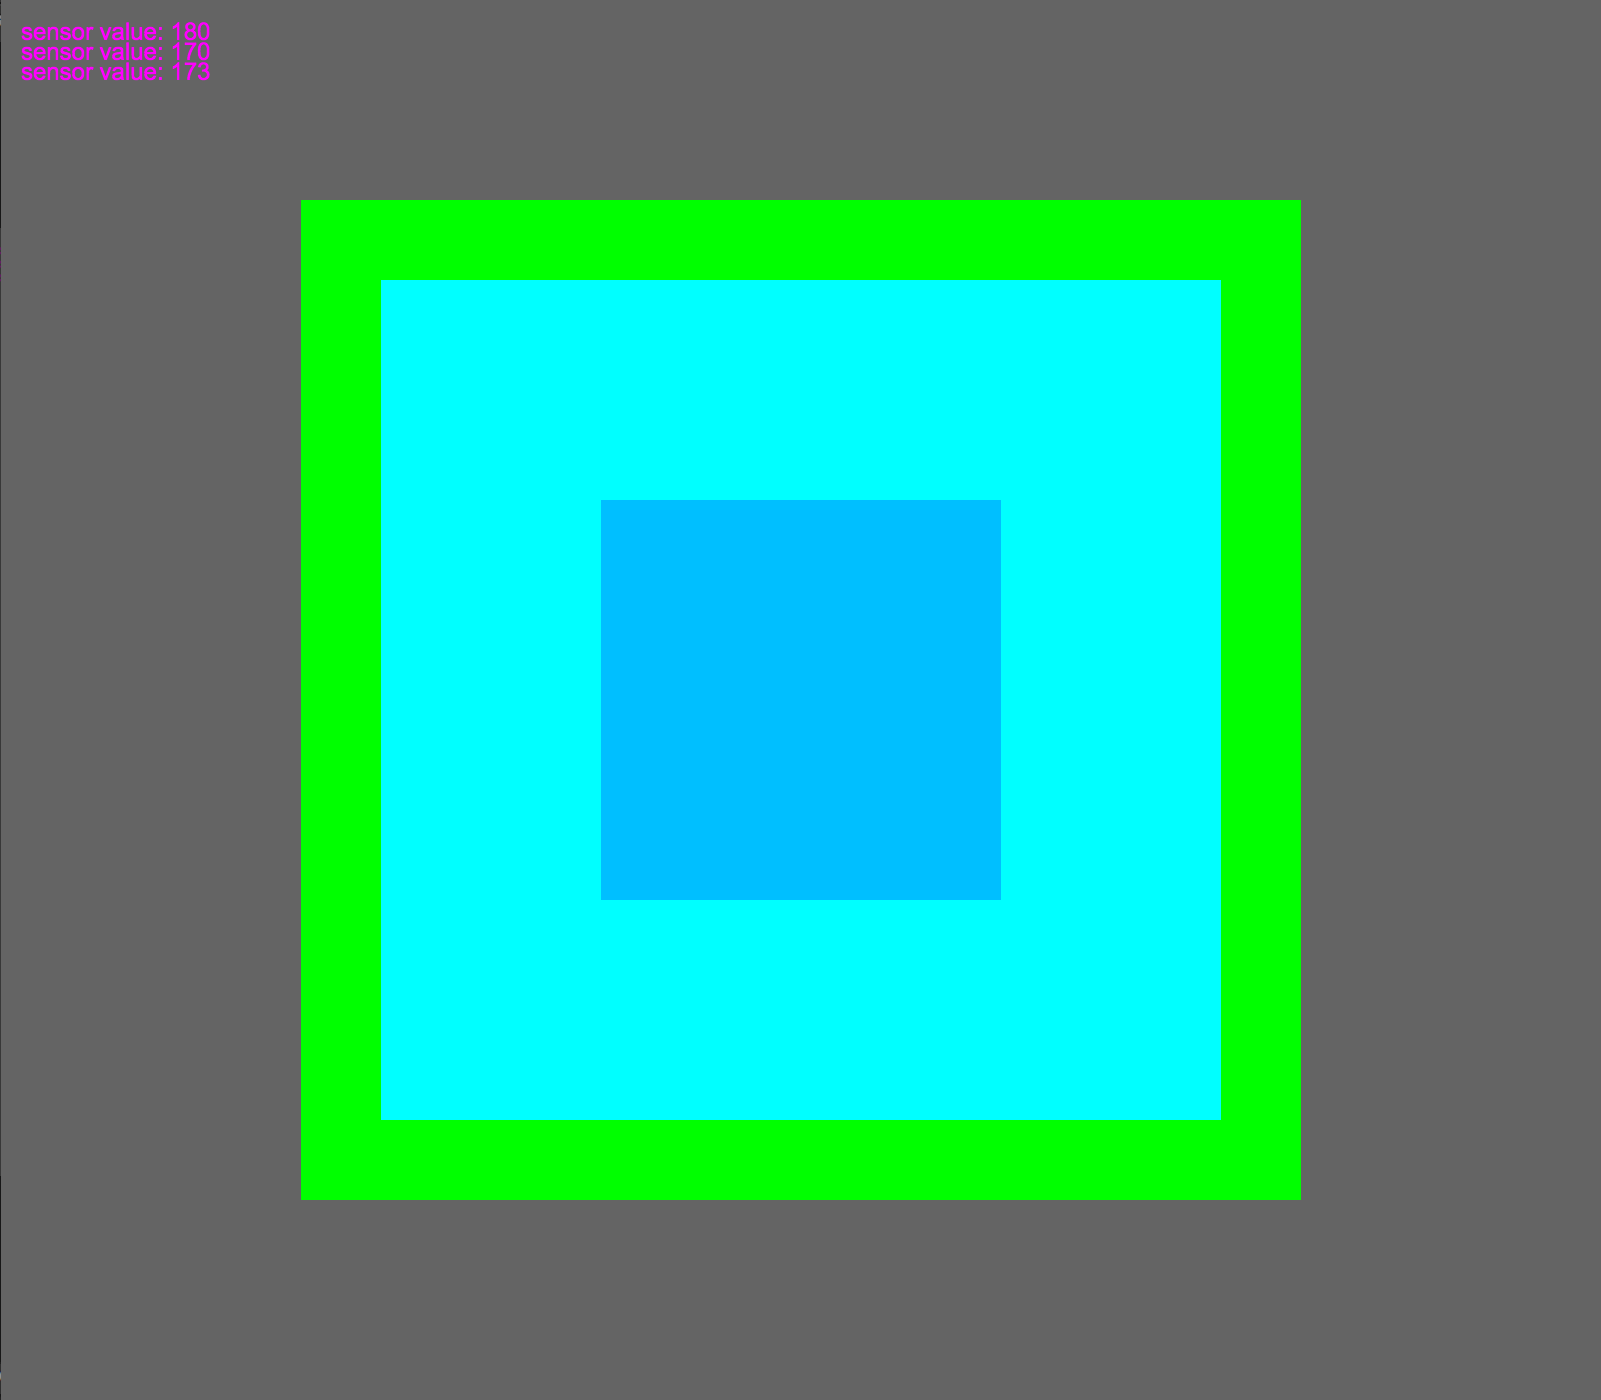
Some of what I’ve been doing in p5 earlier this semester will prove to be very helpful as basic stepping stones in this project.

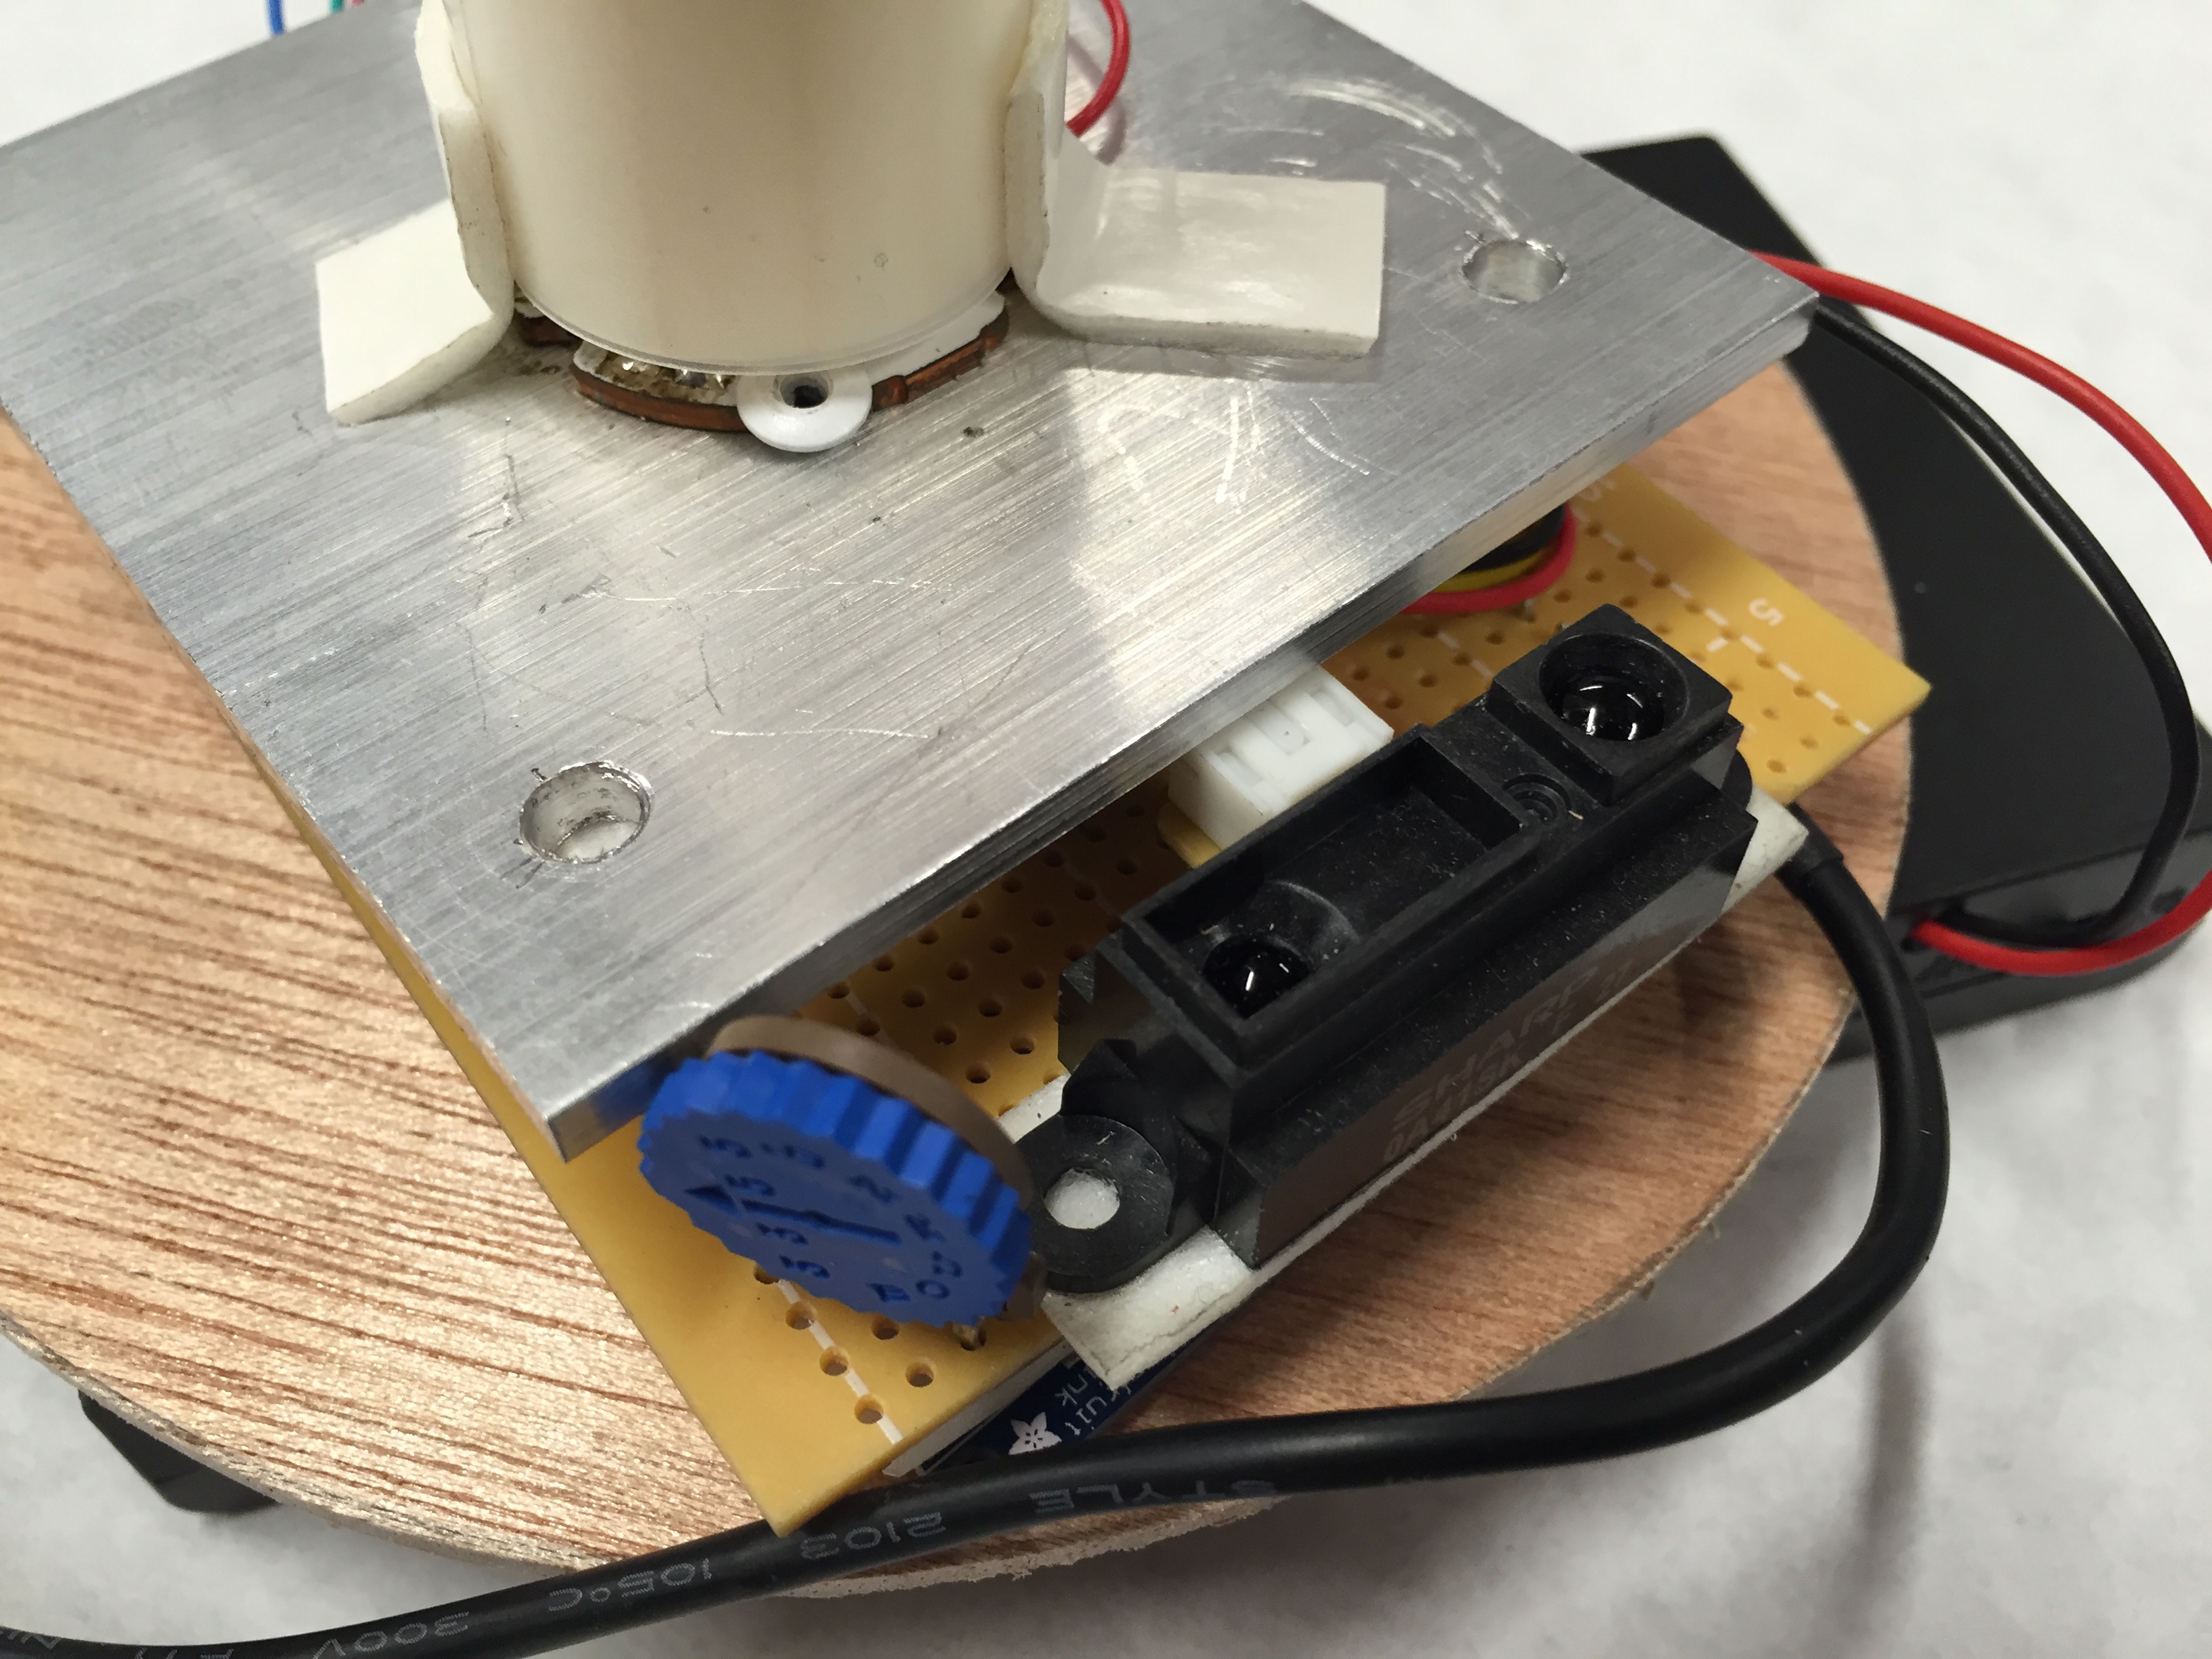
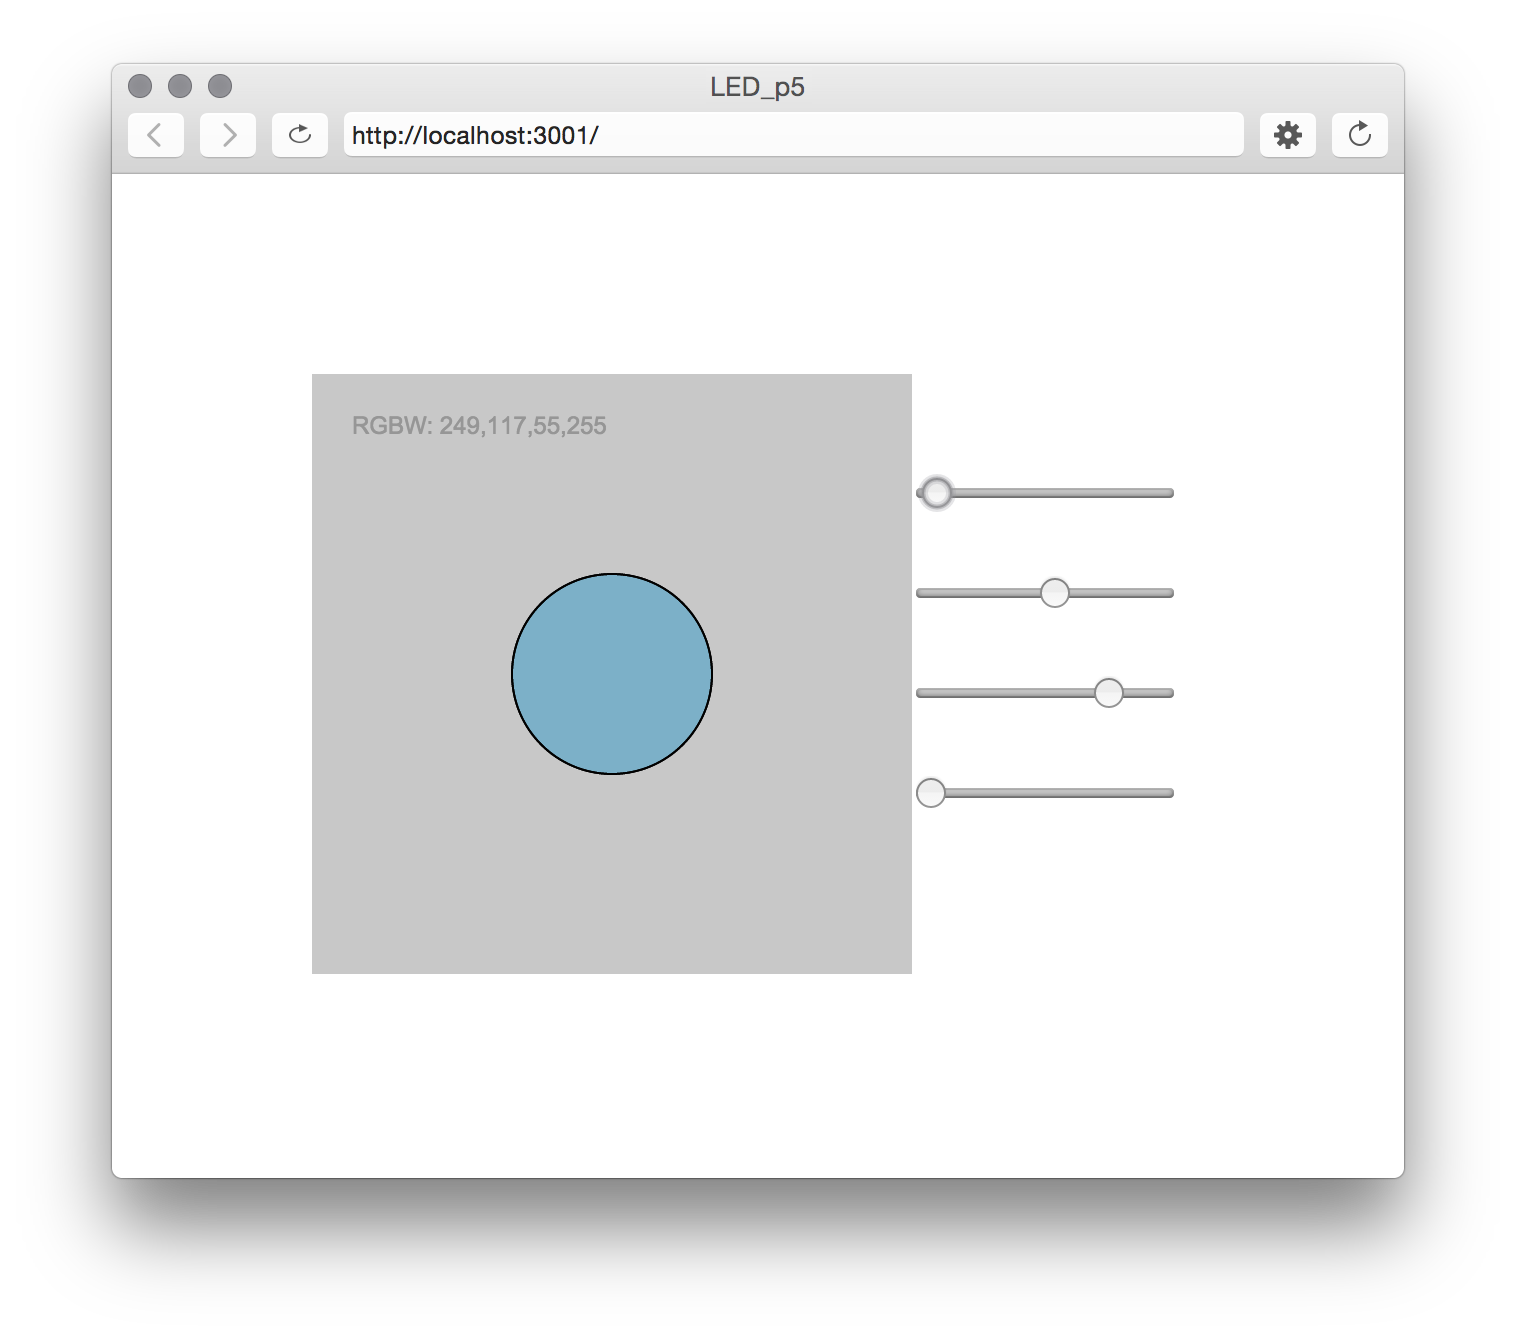
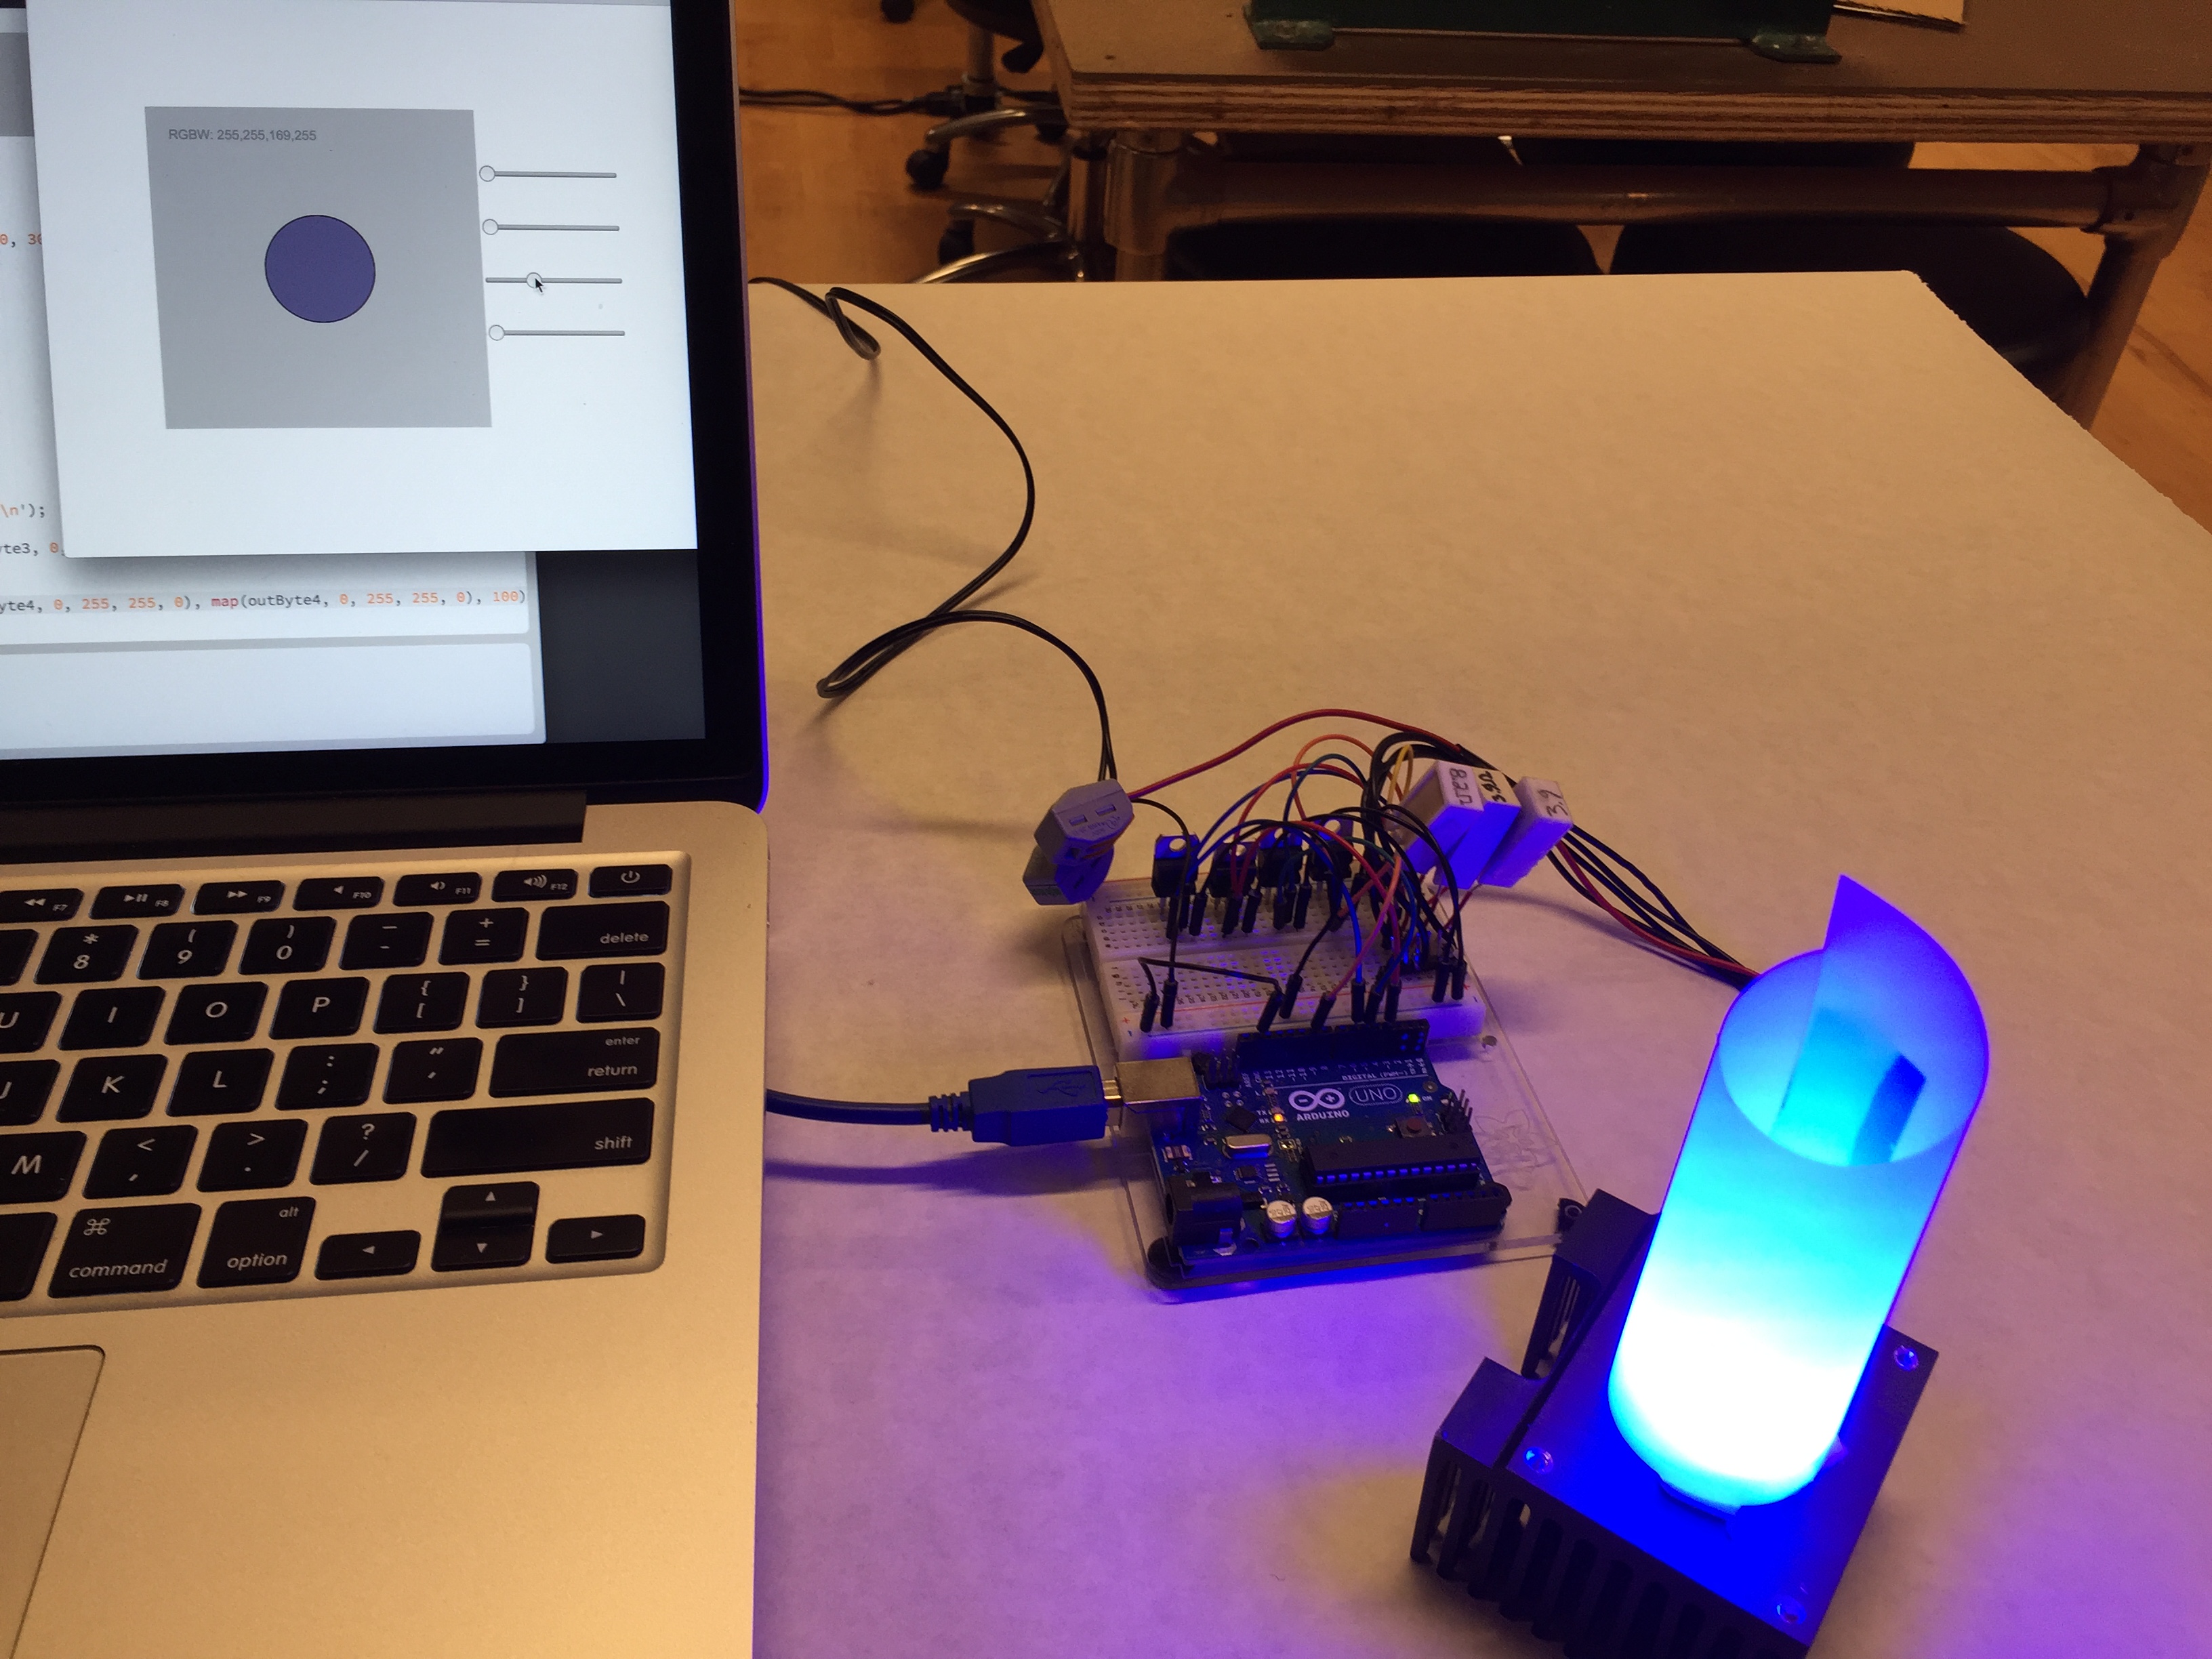
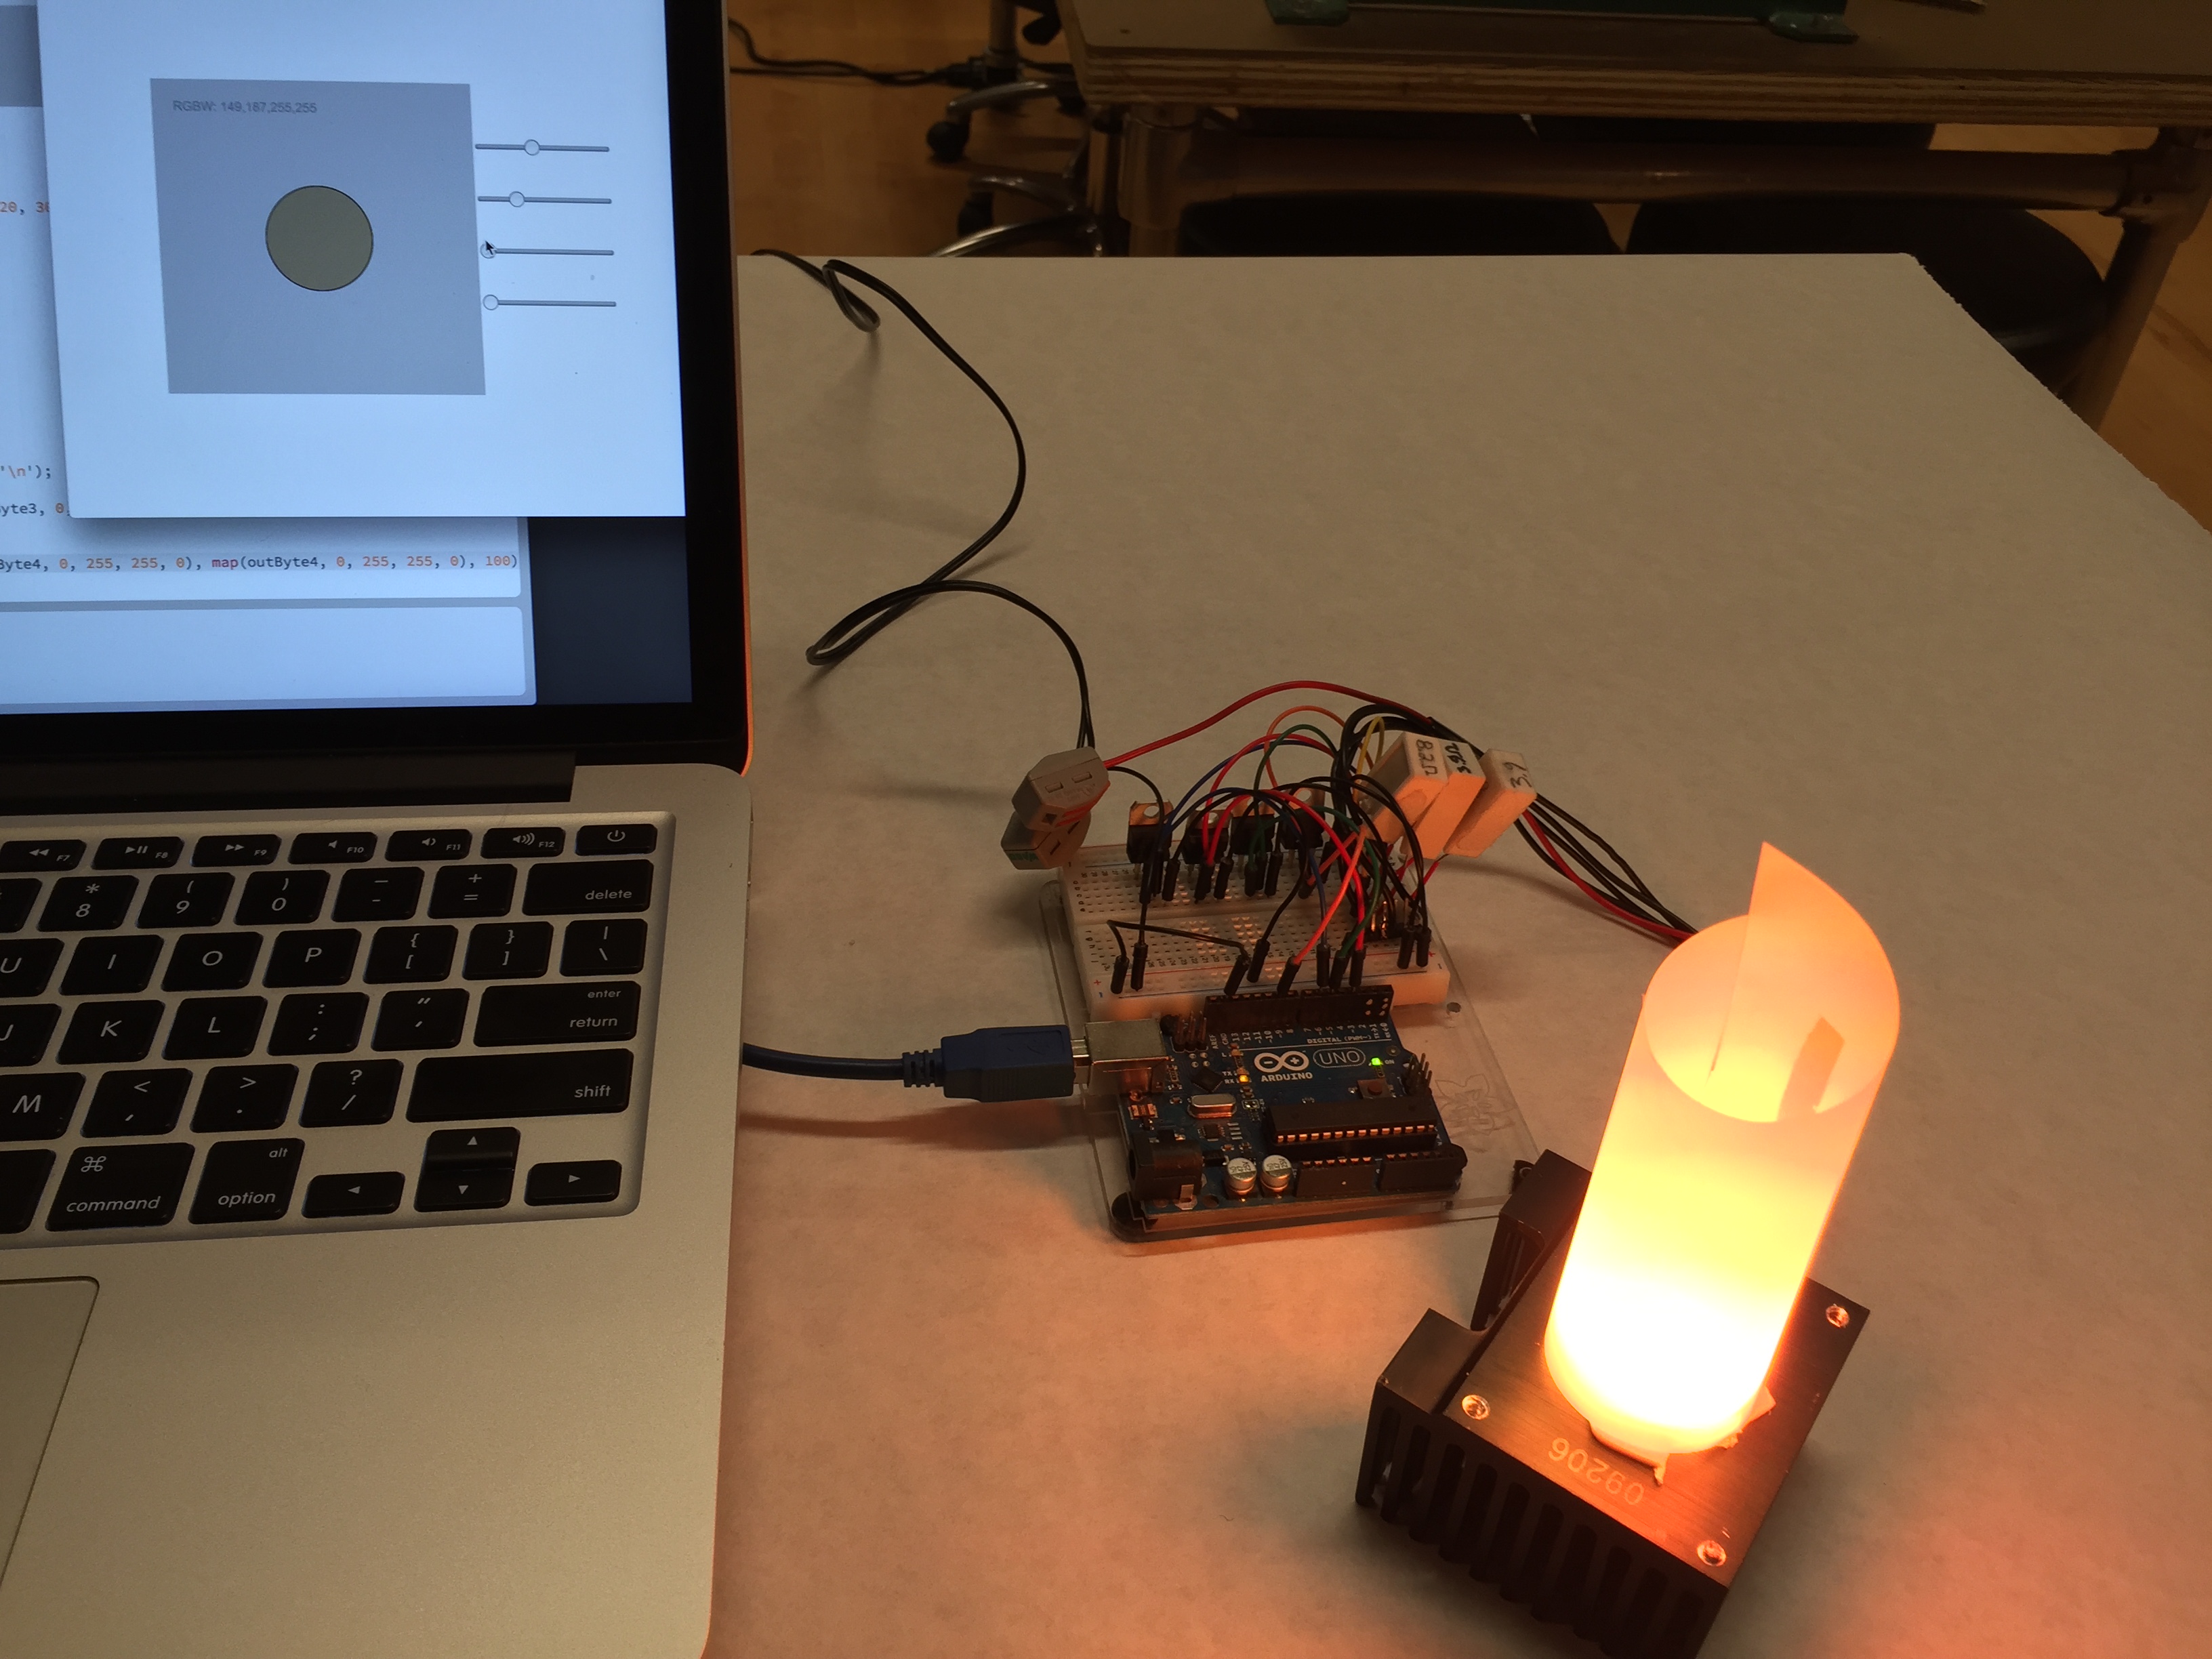
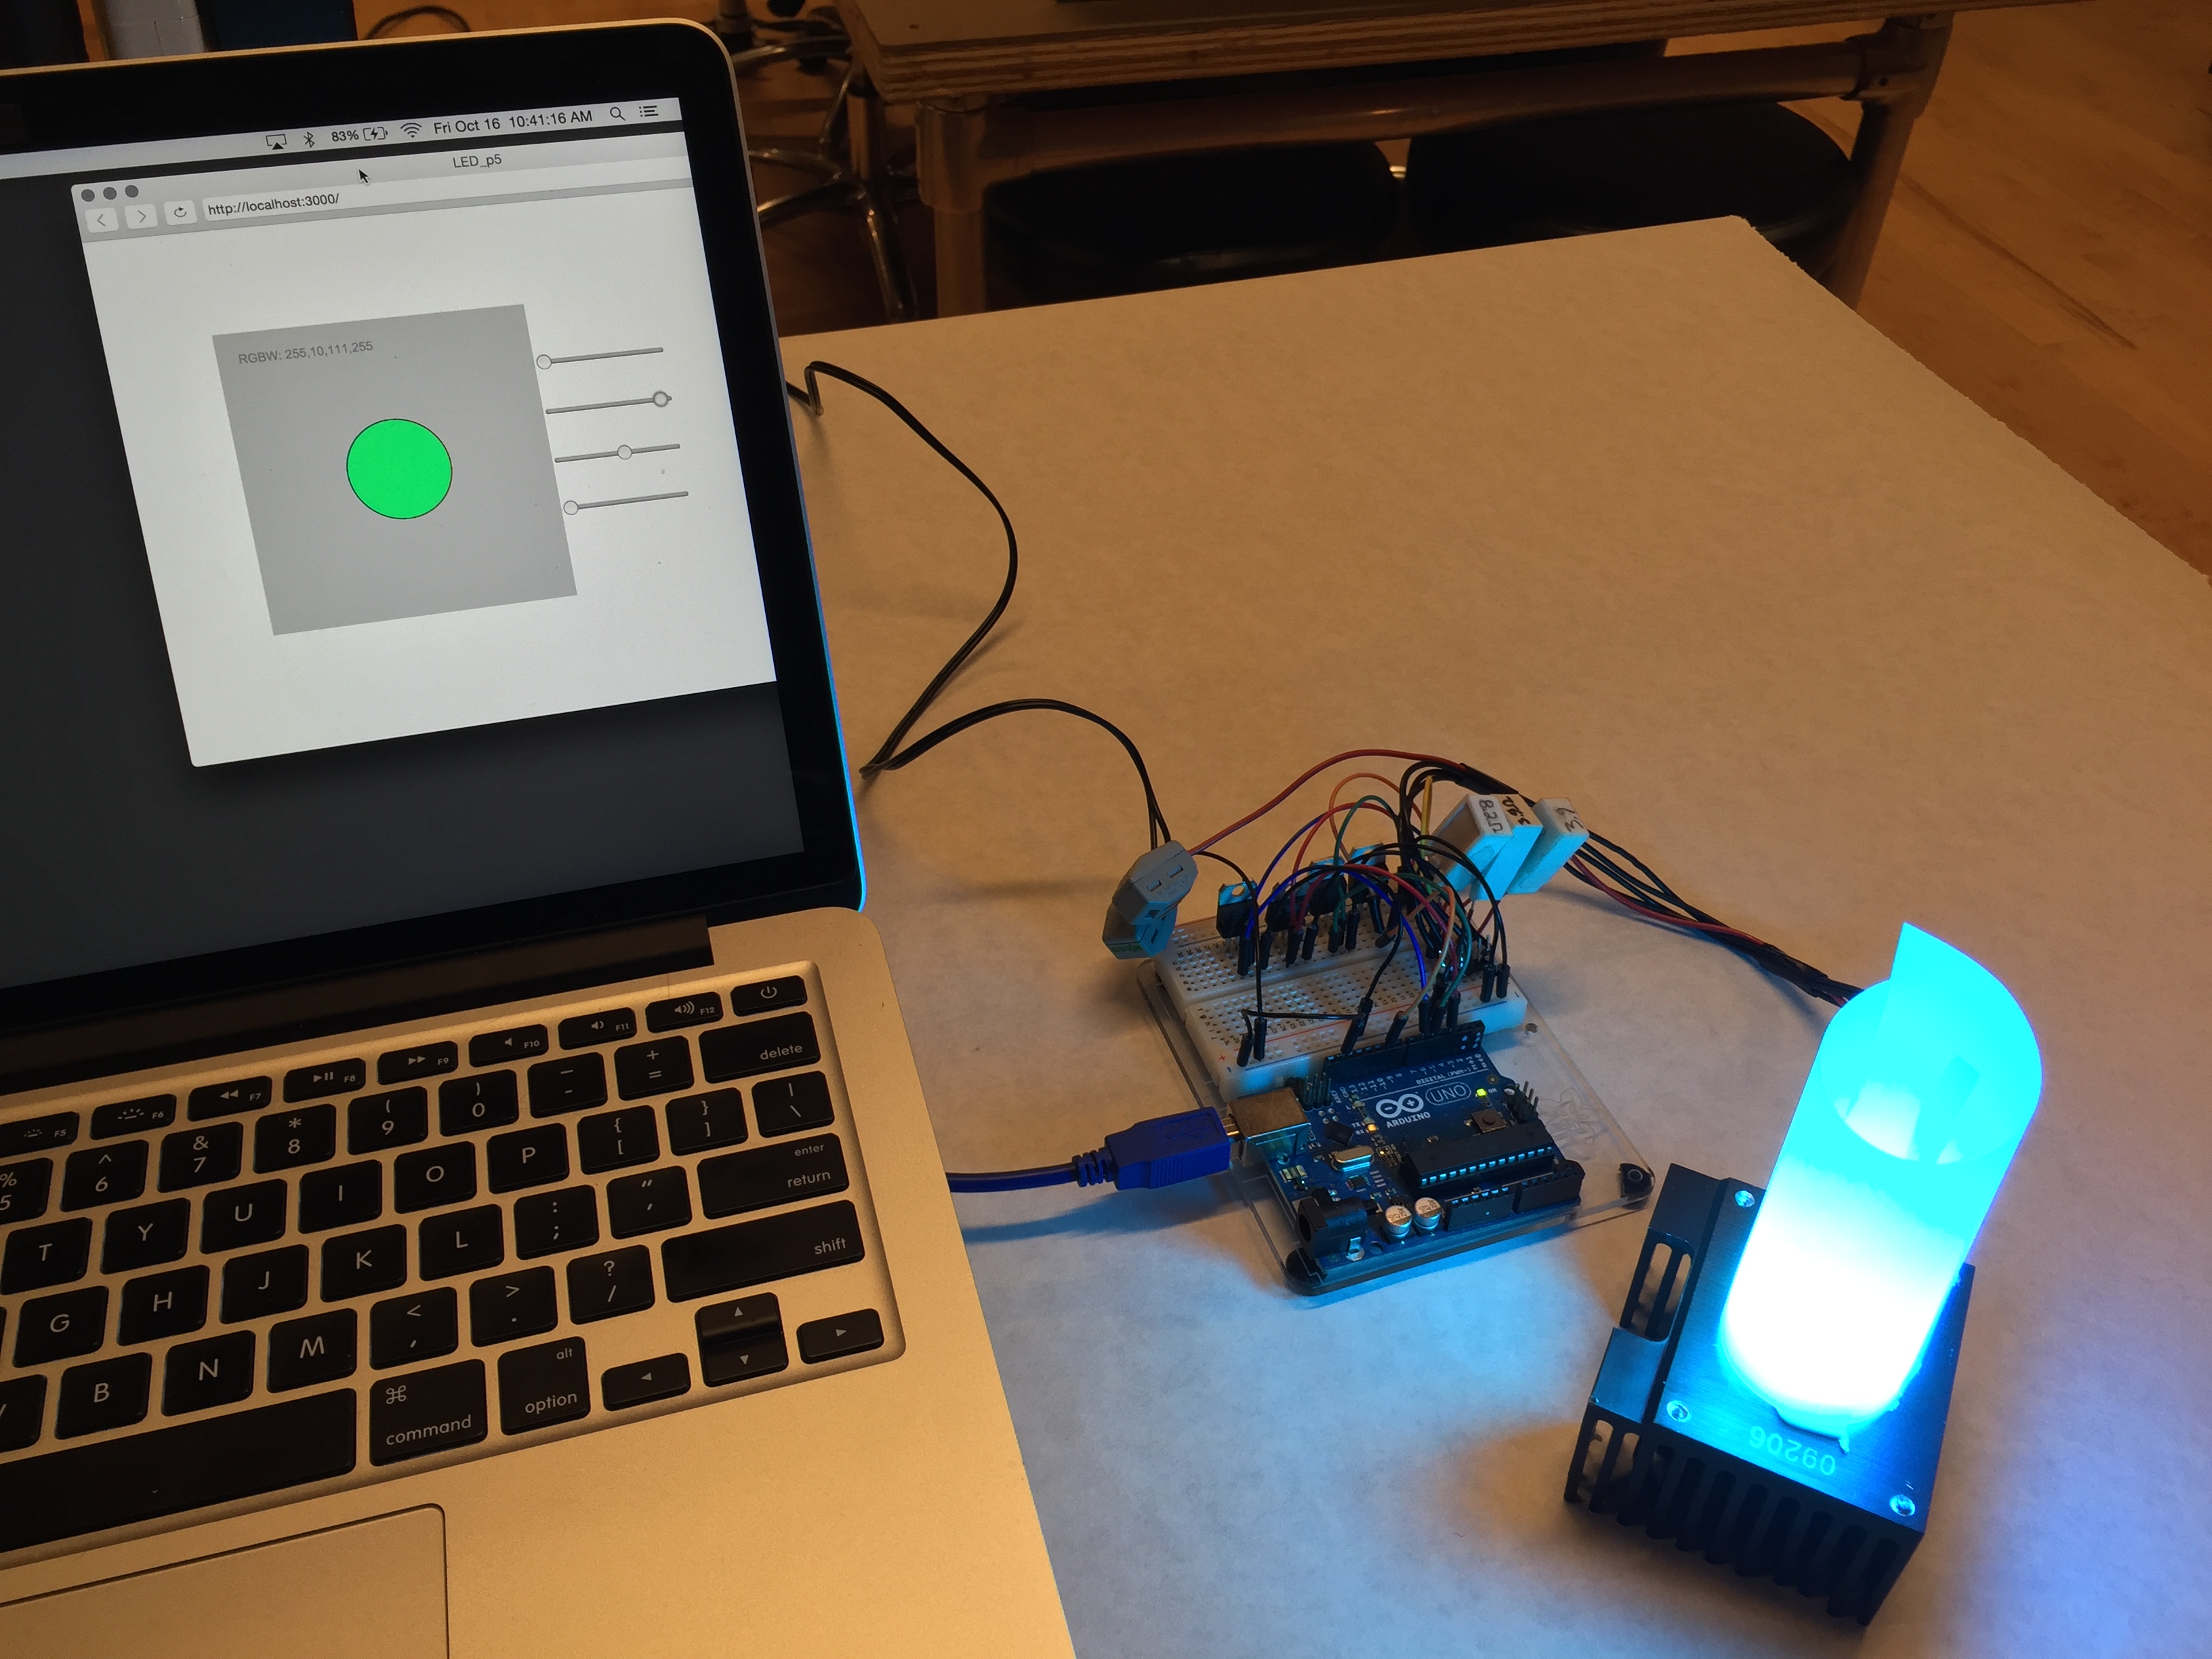
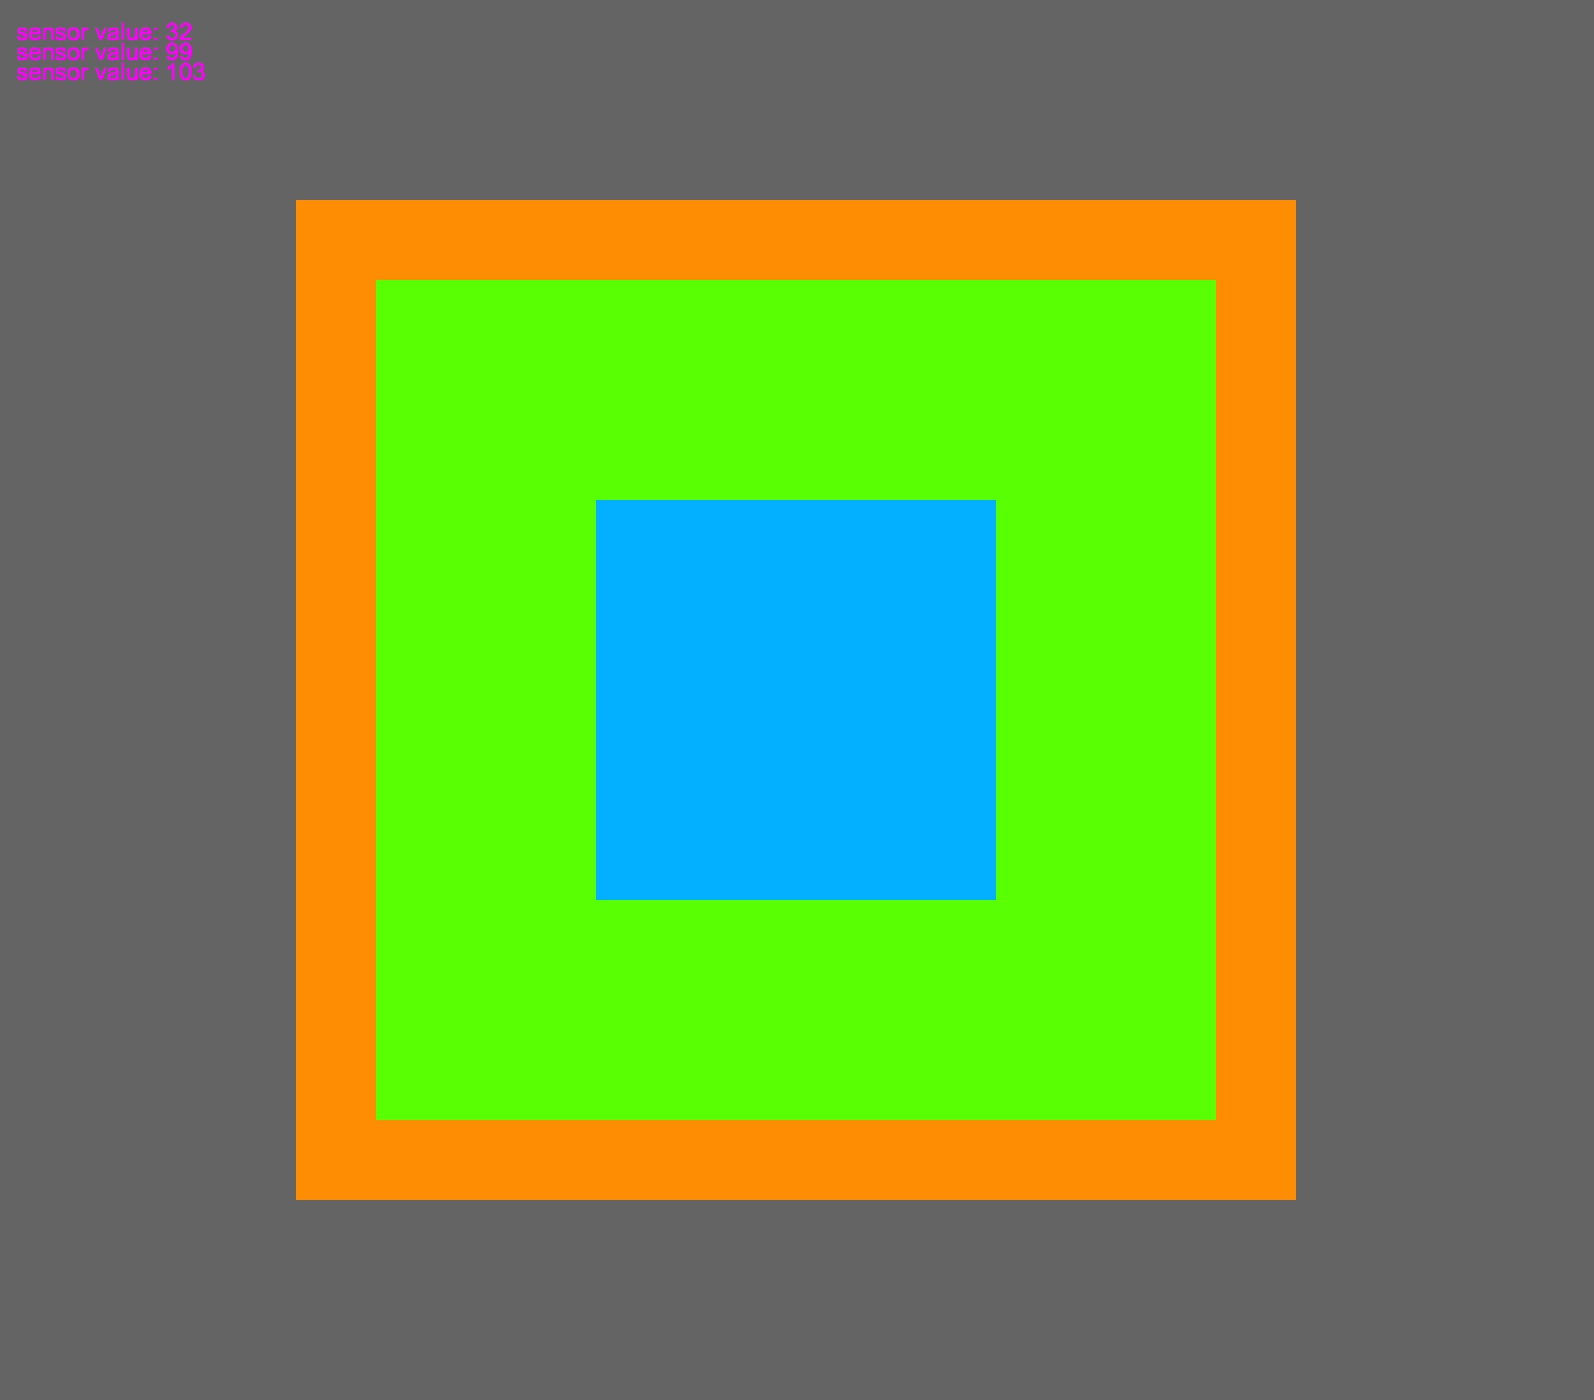
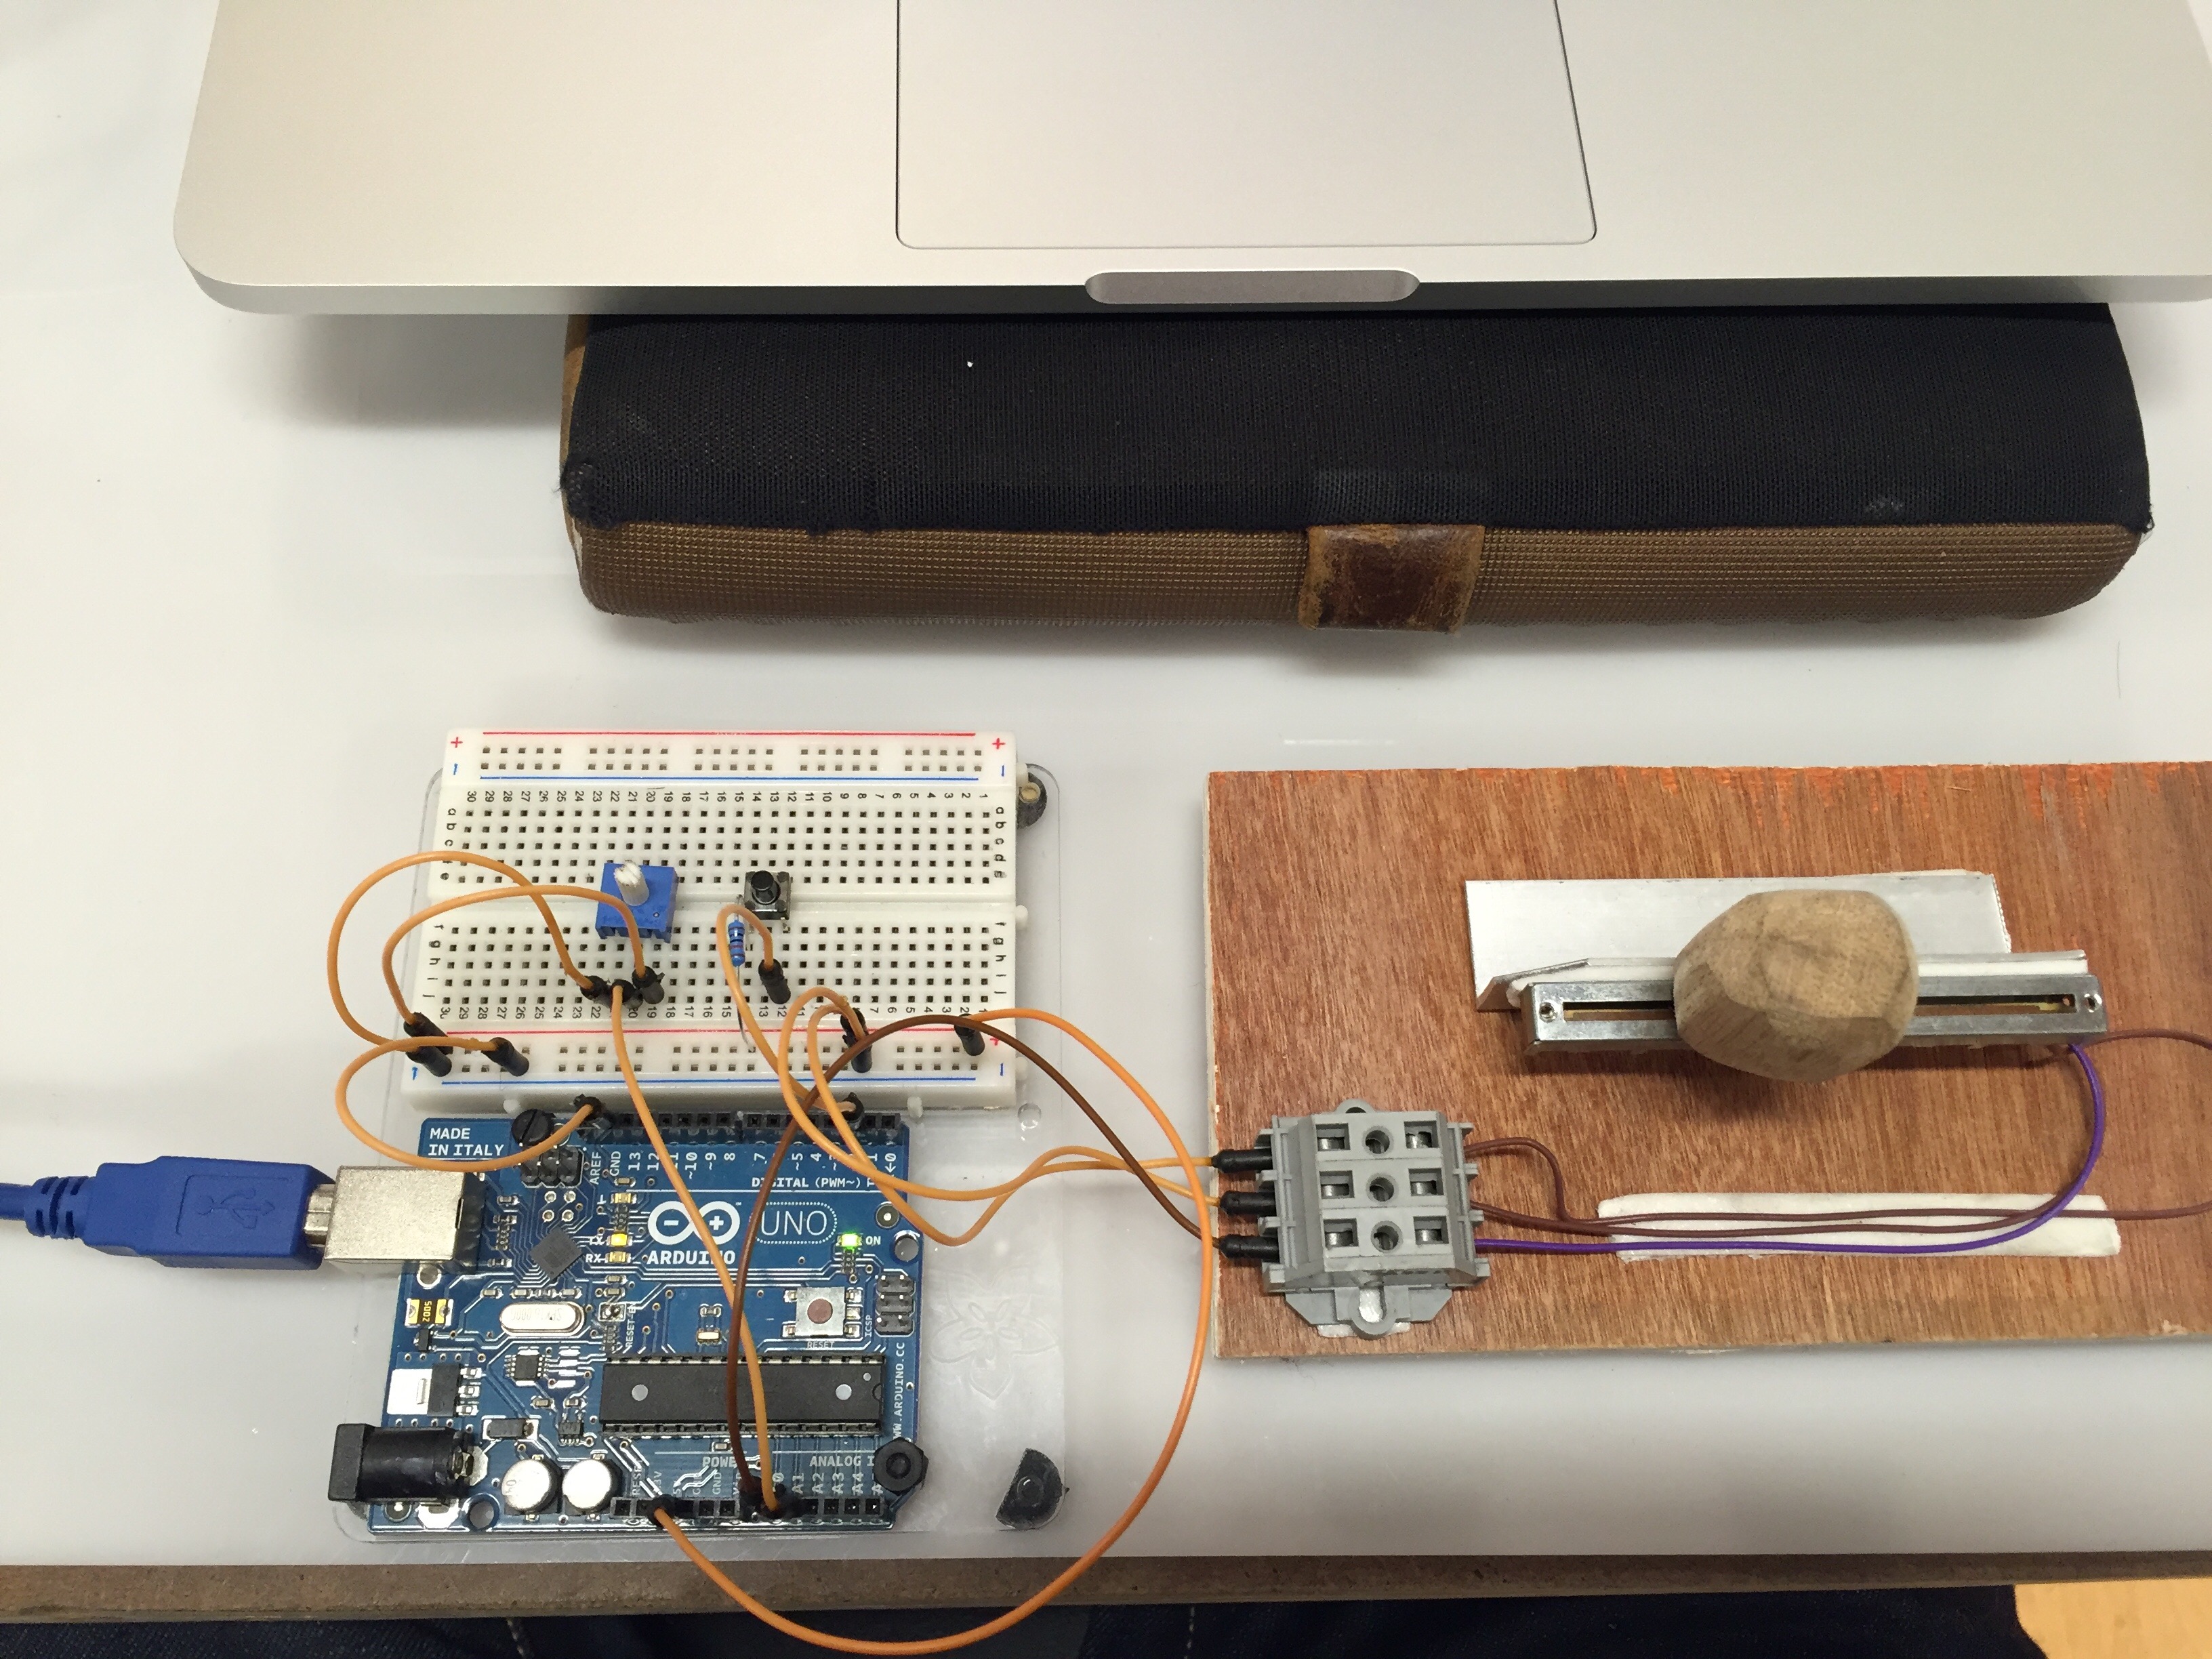
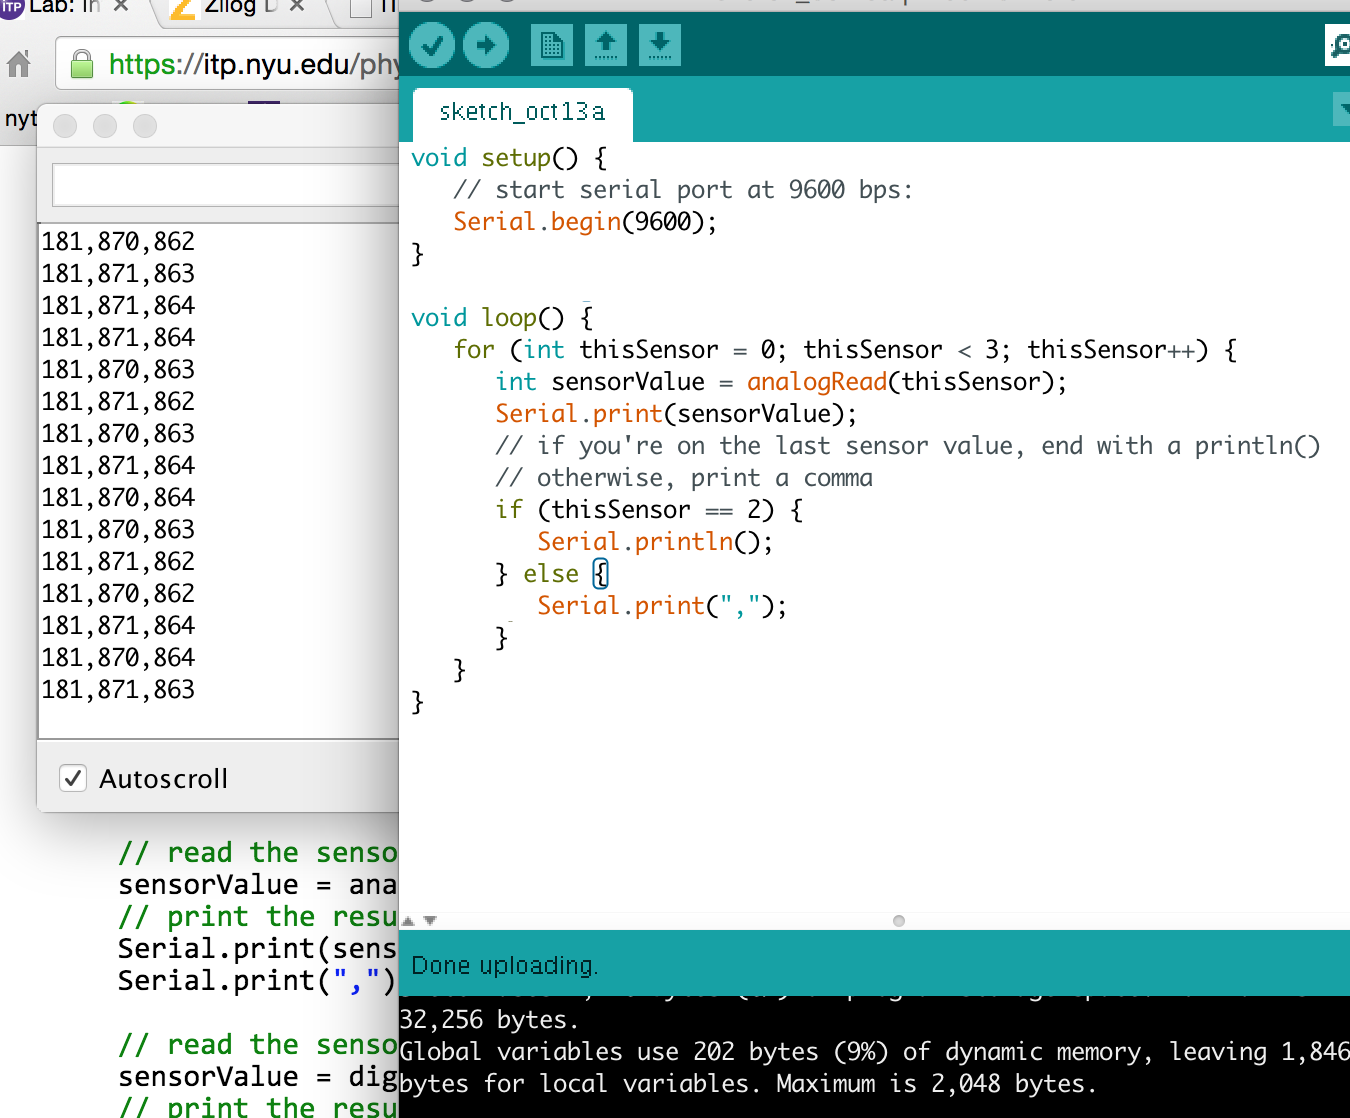
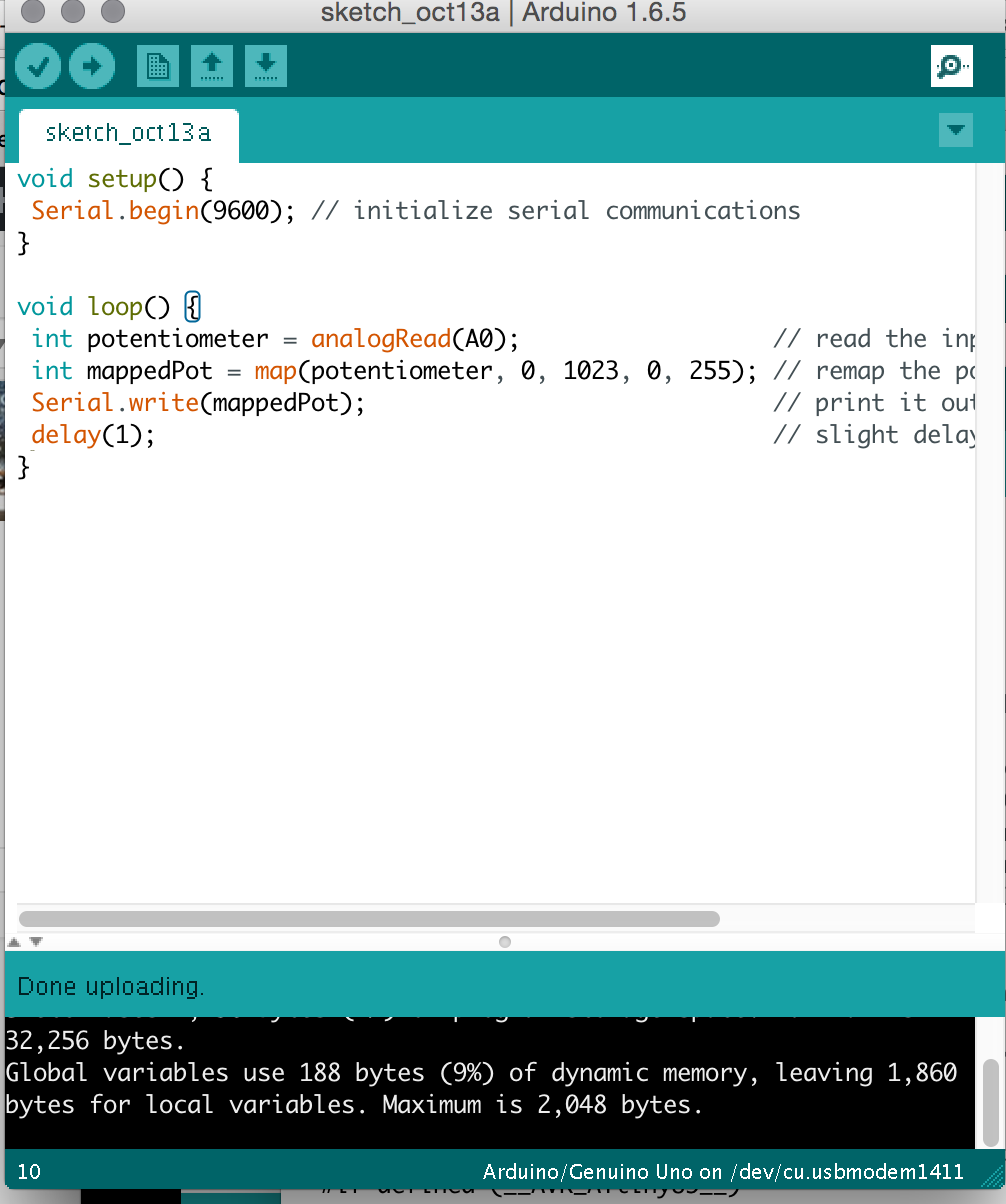
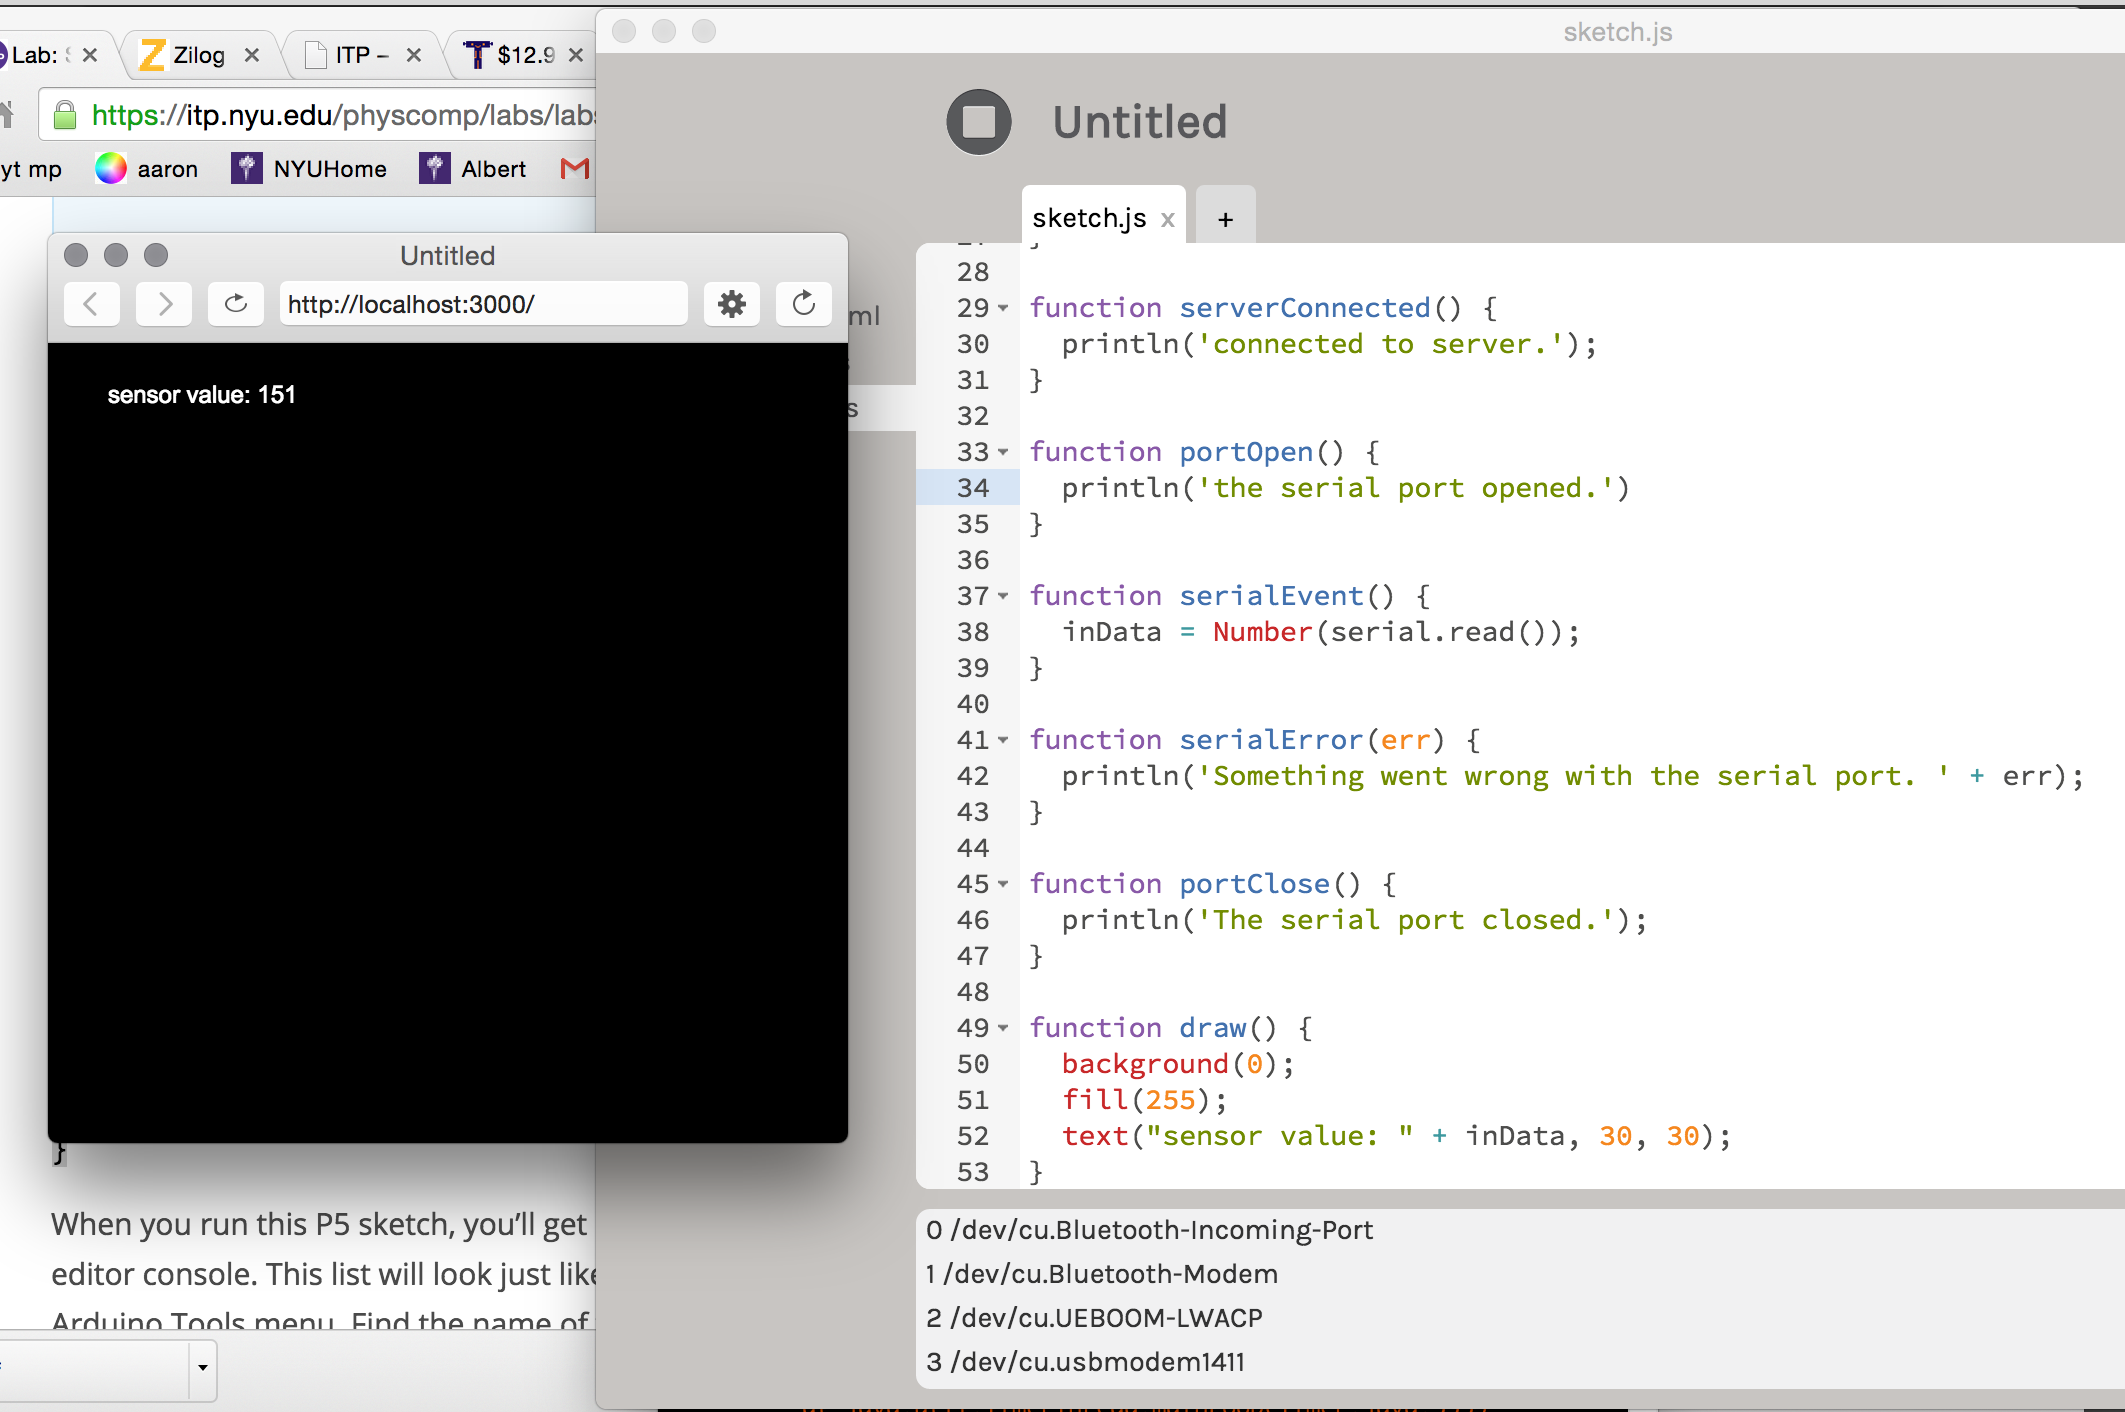
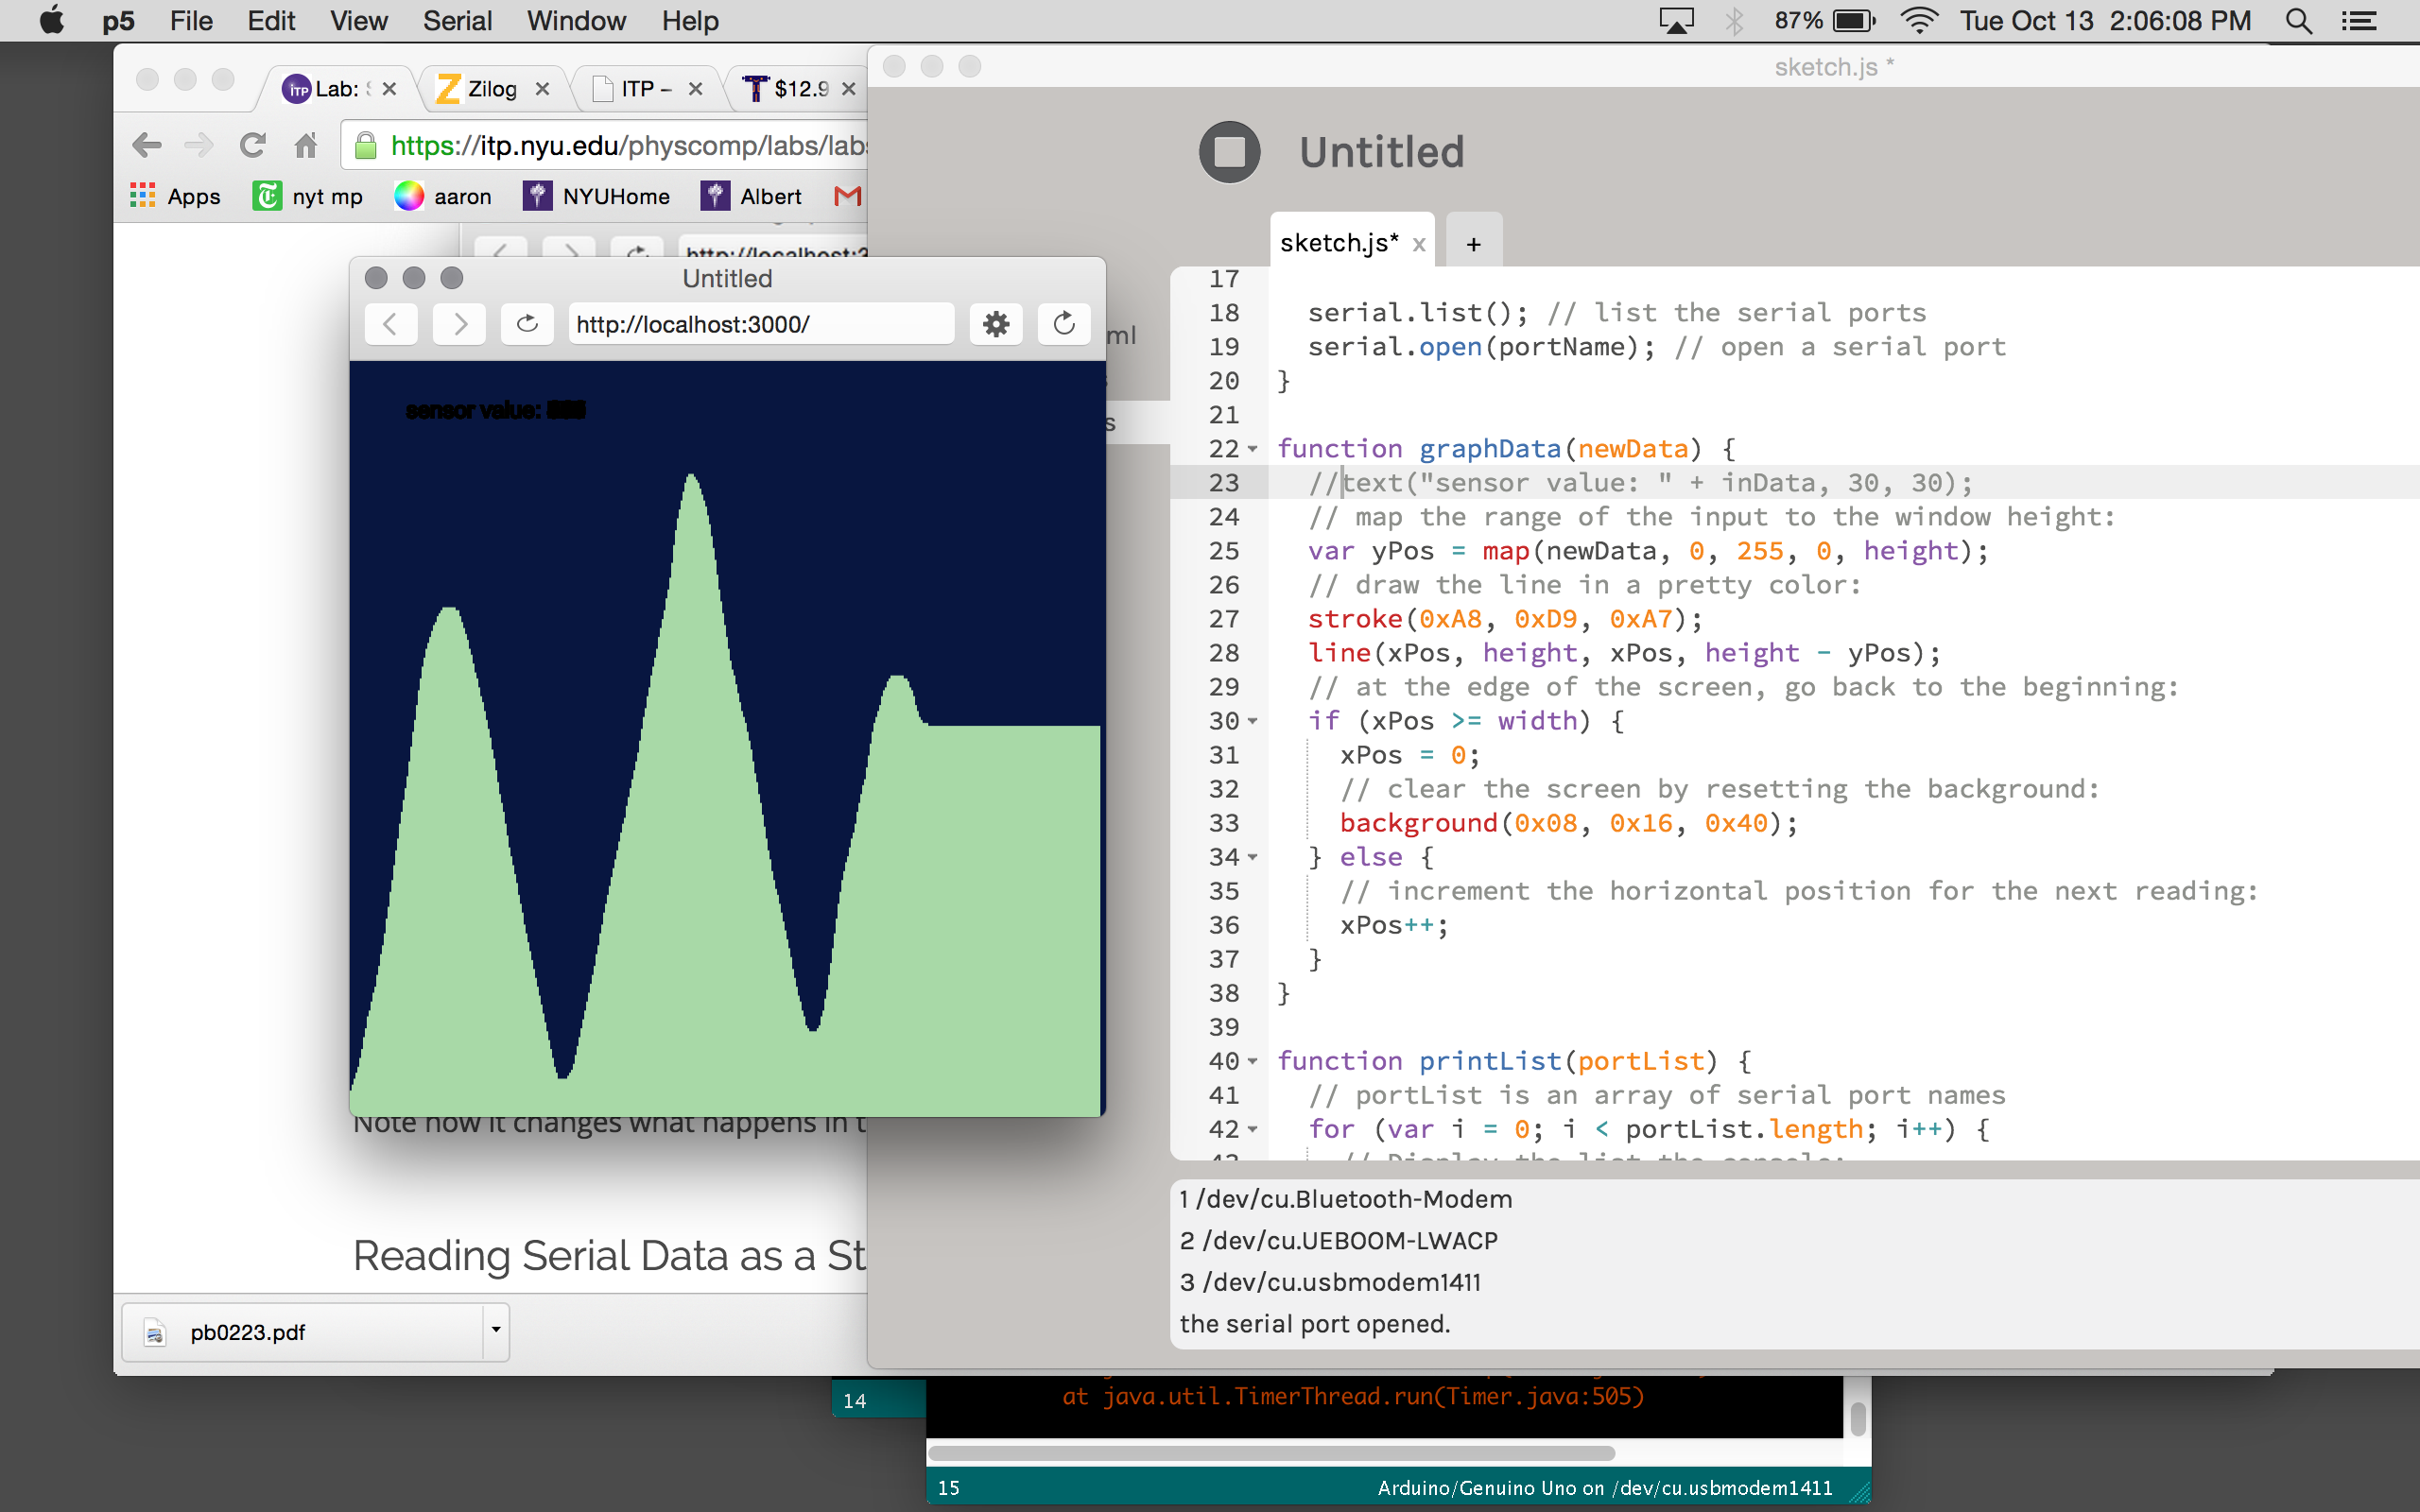
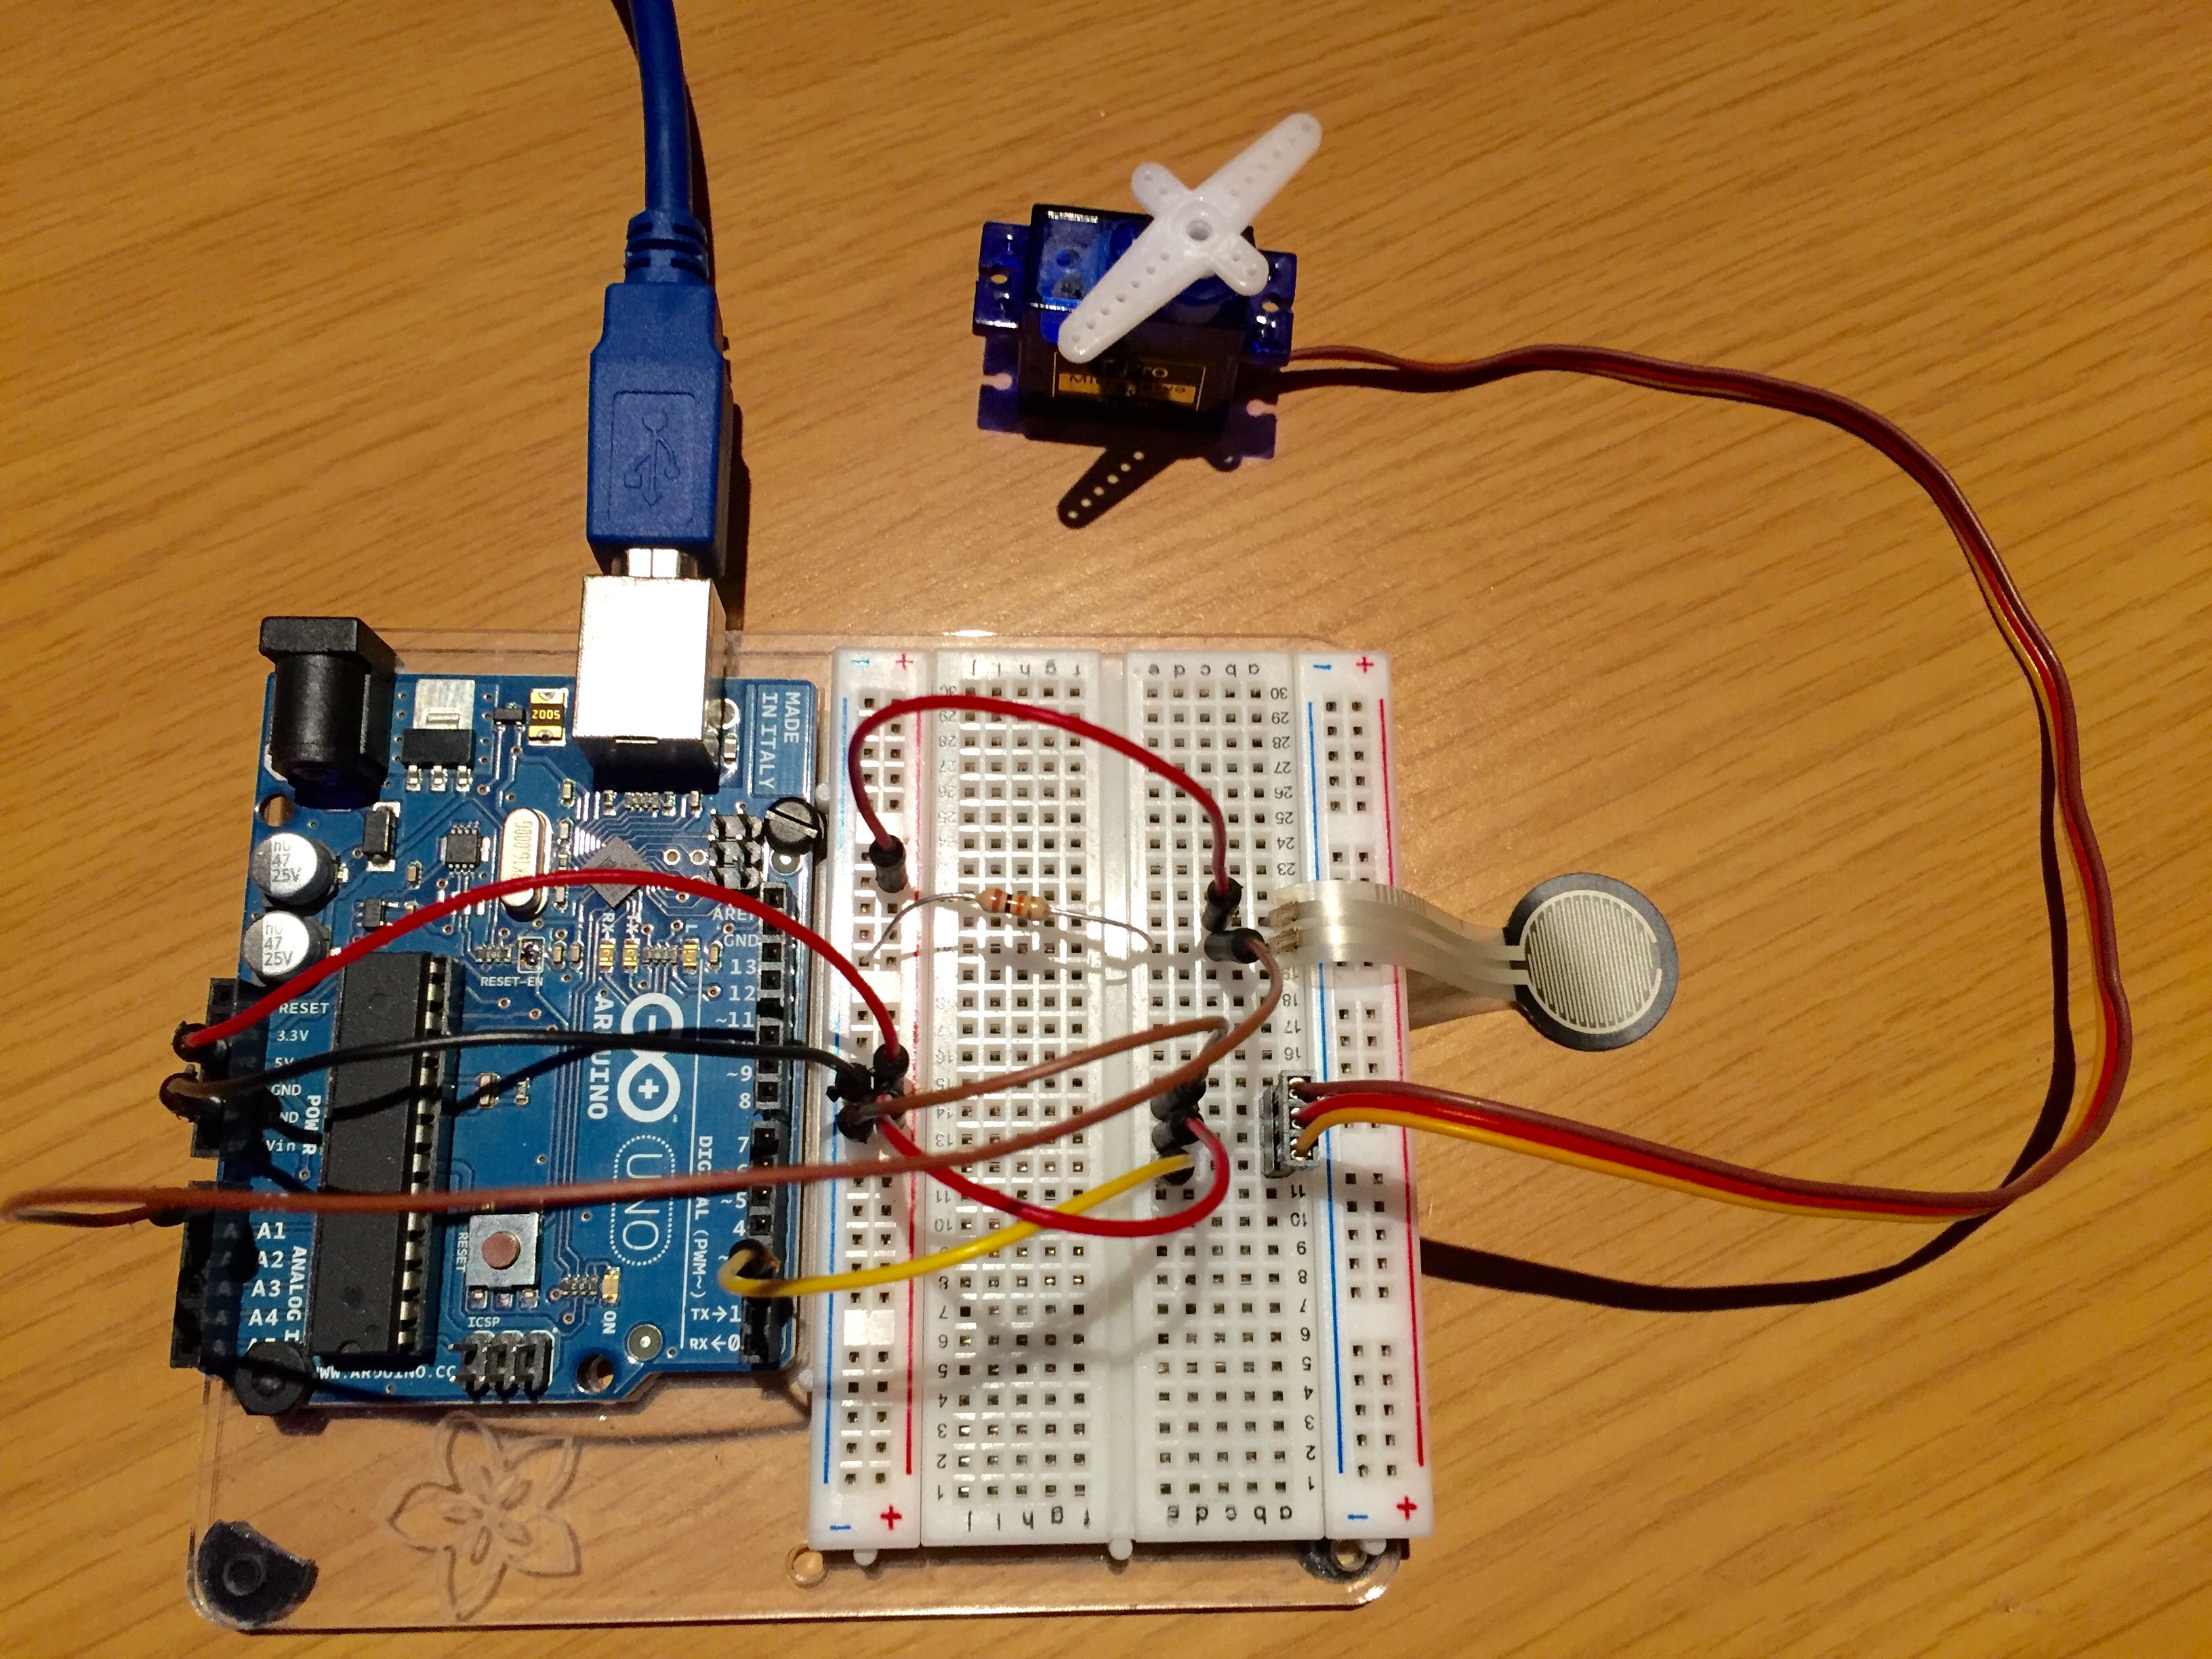
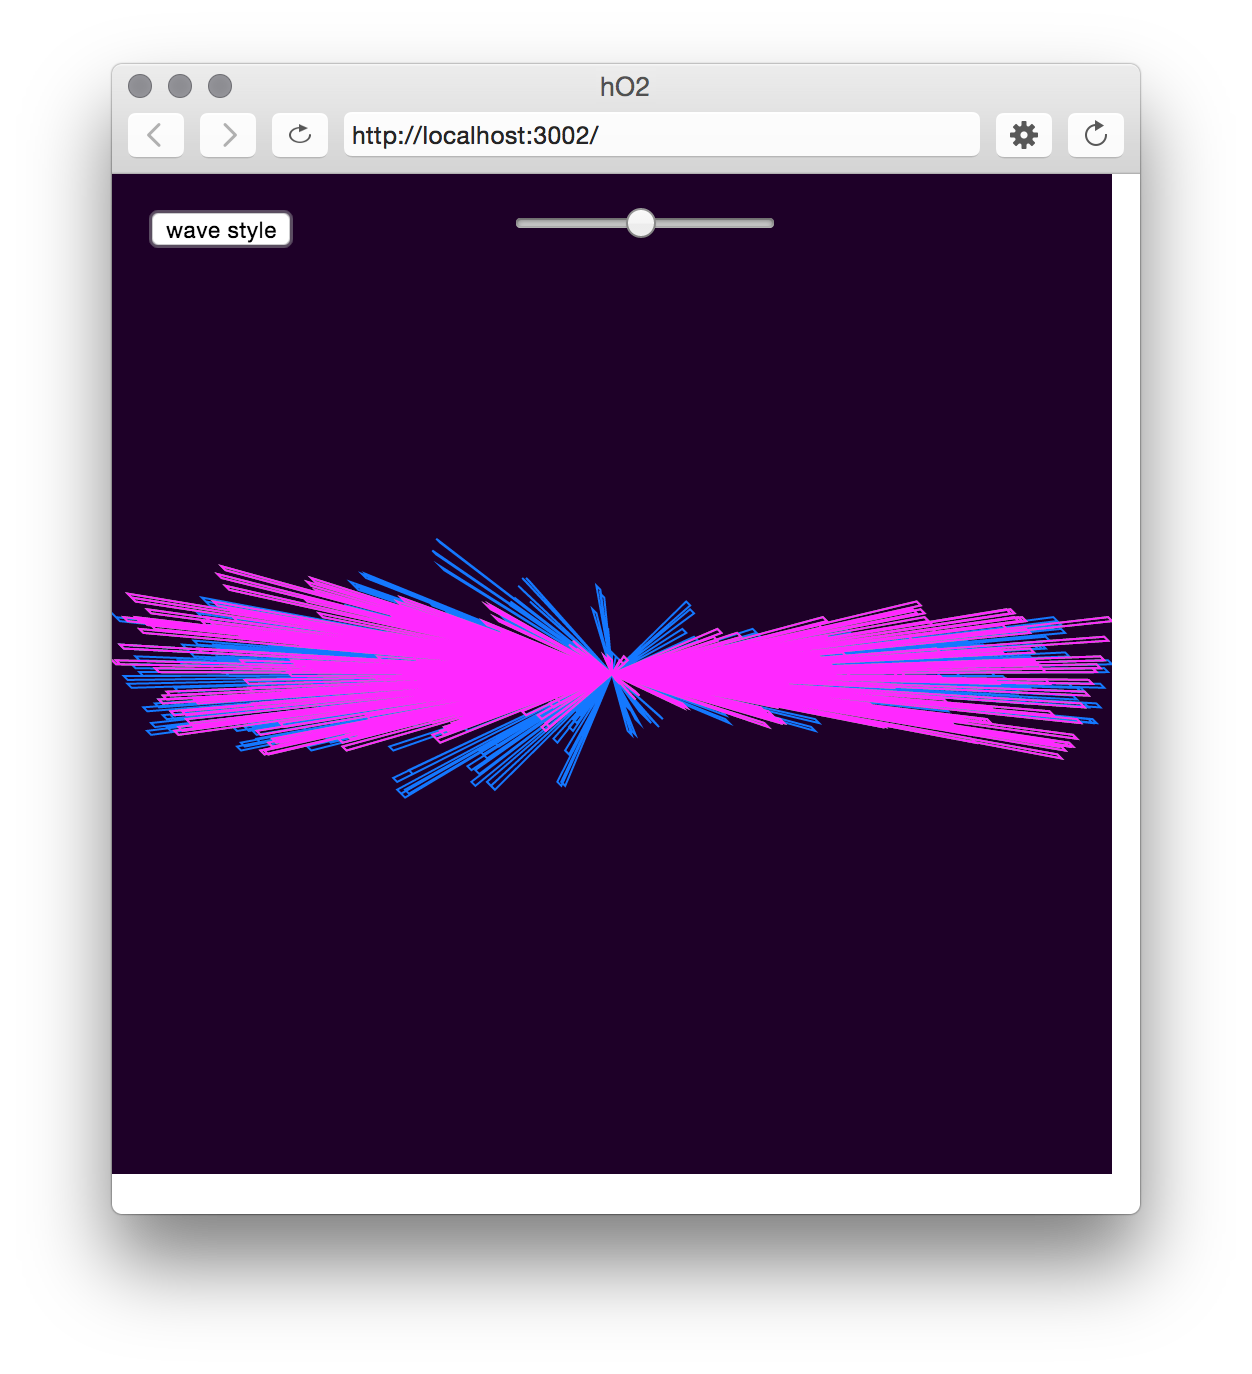
Manipulating p5 elements via serial data and physical sensors:

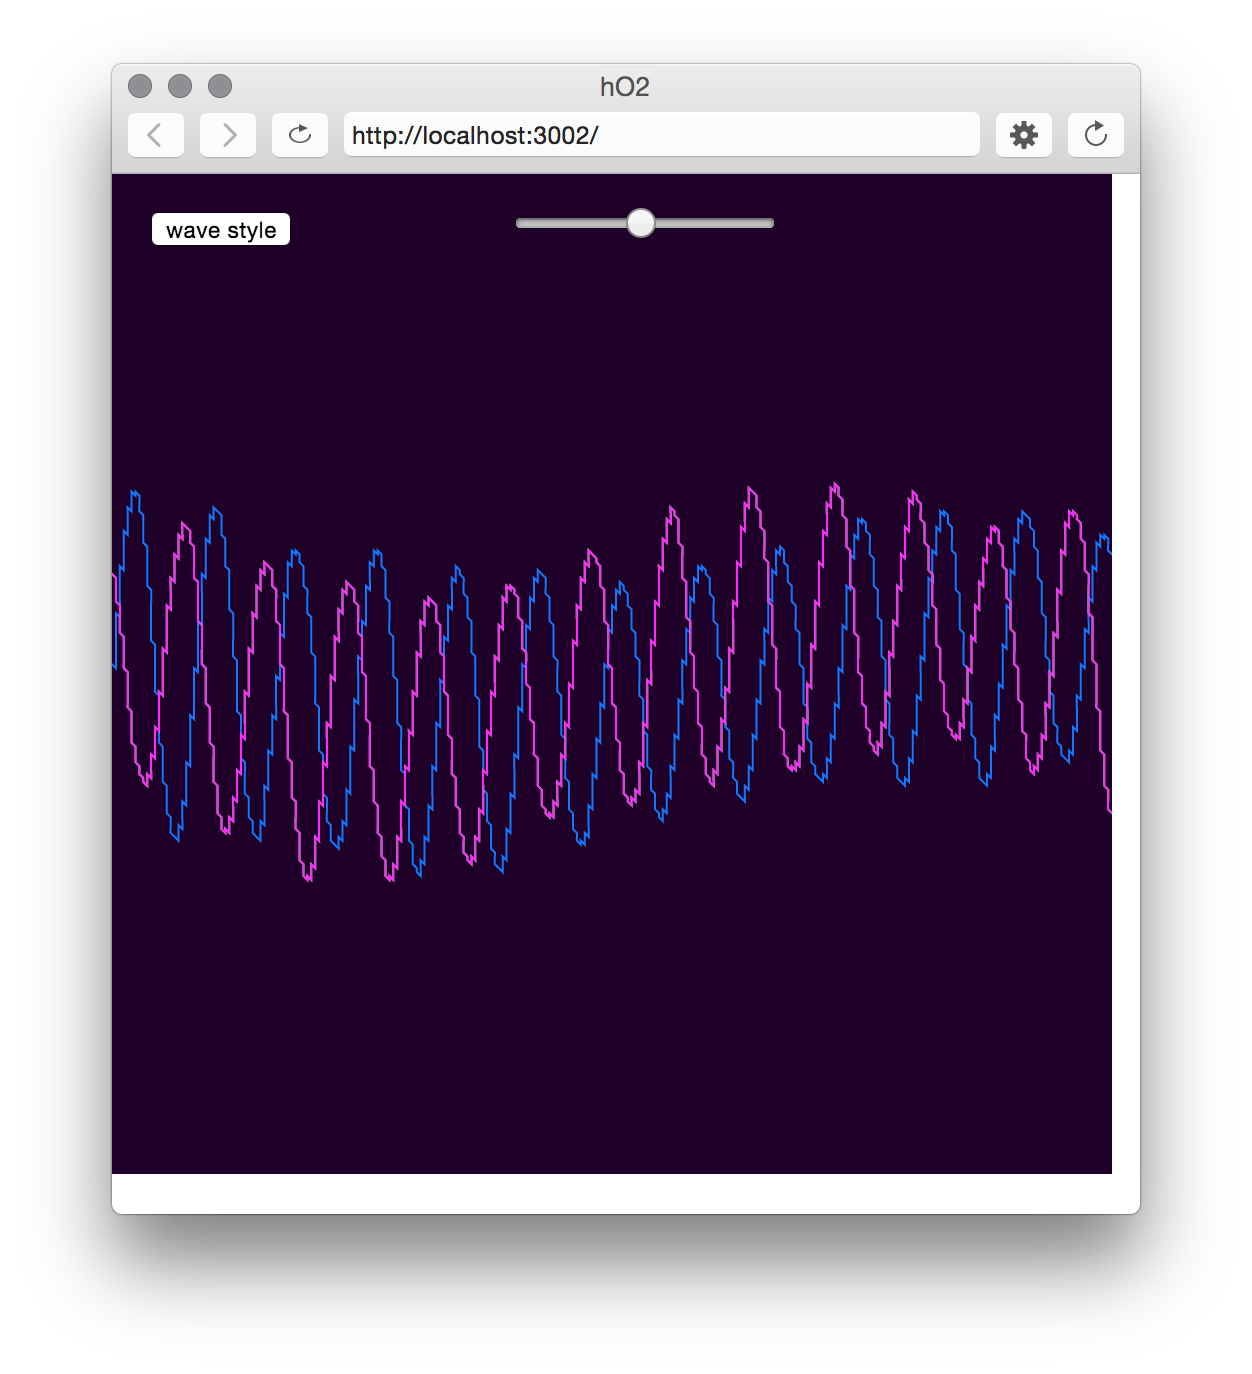
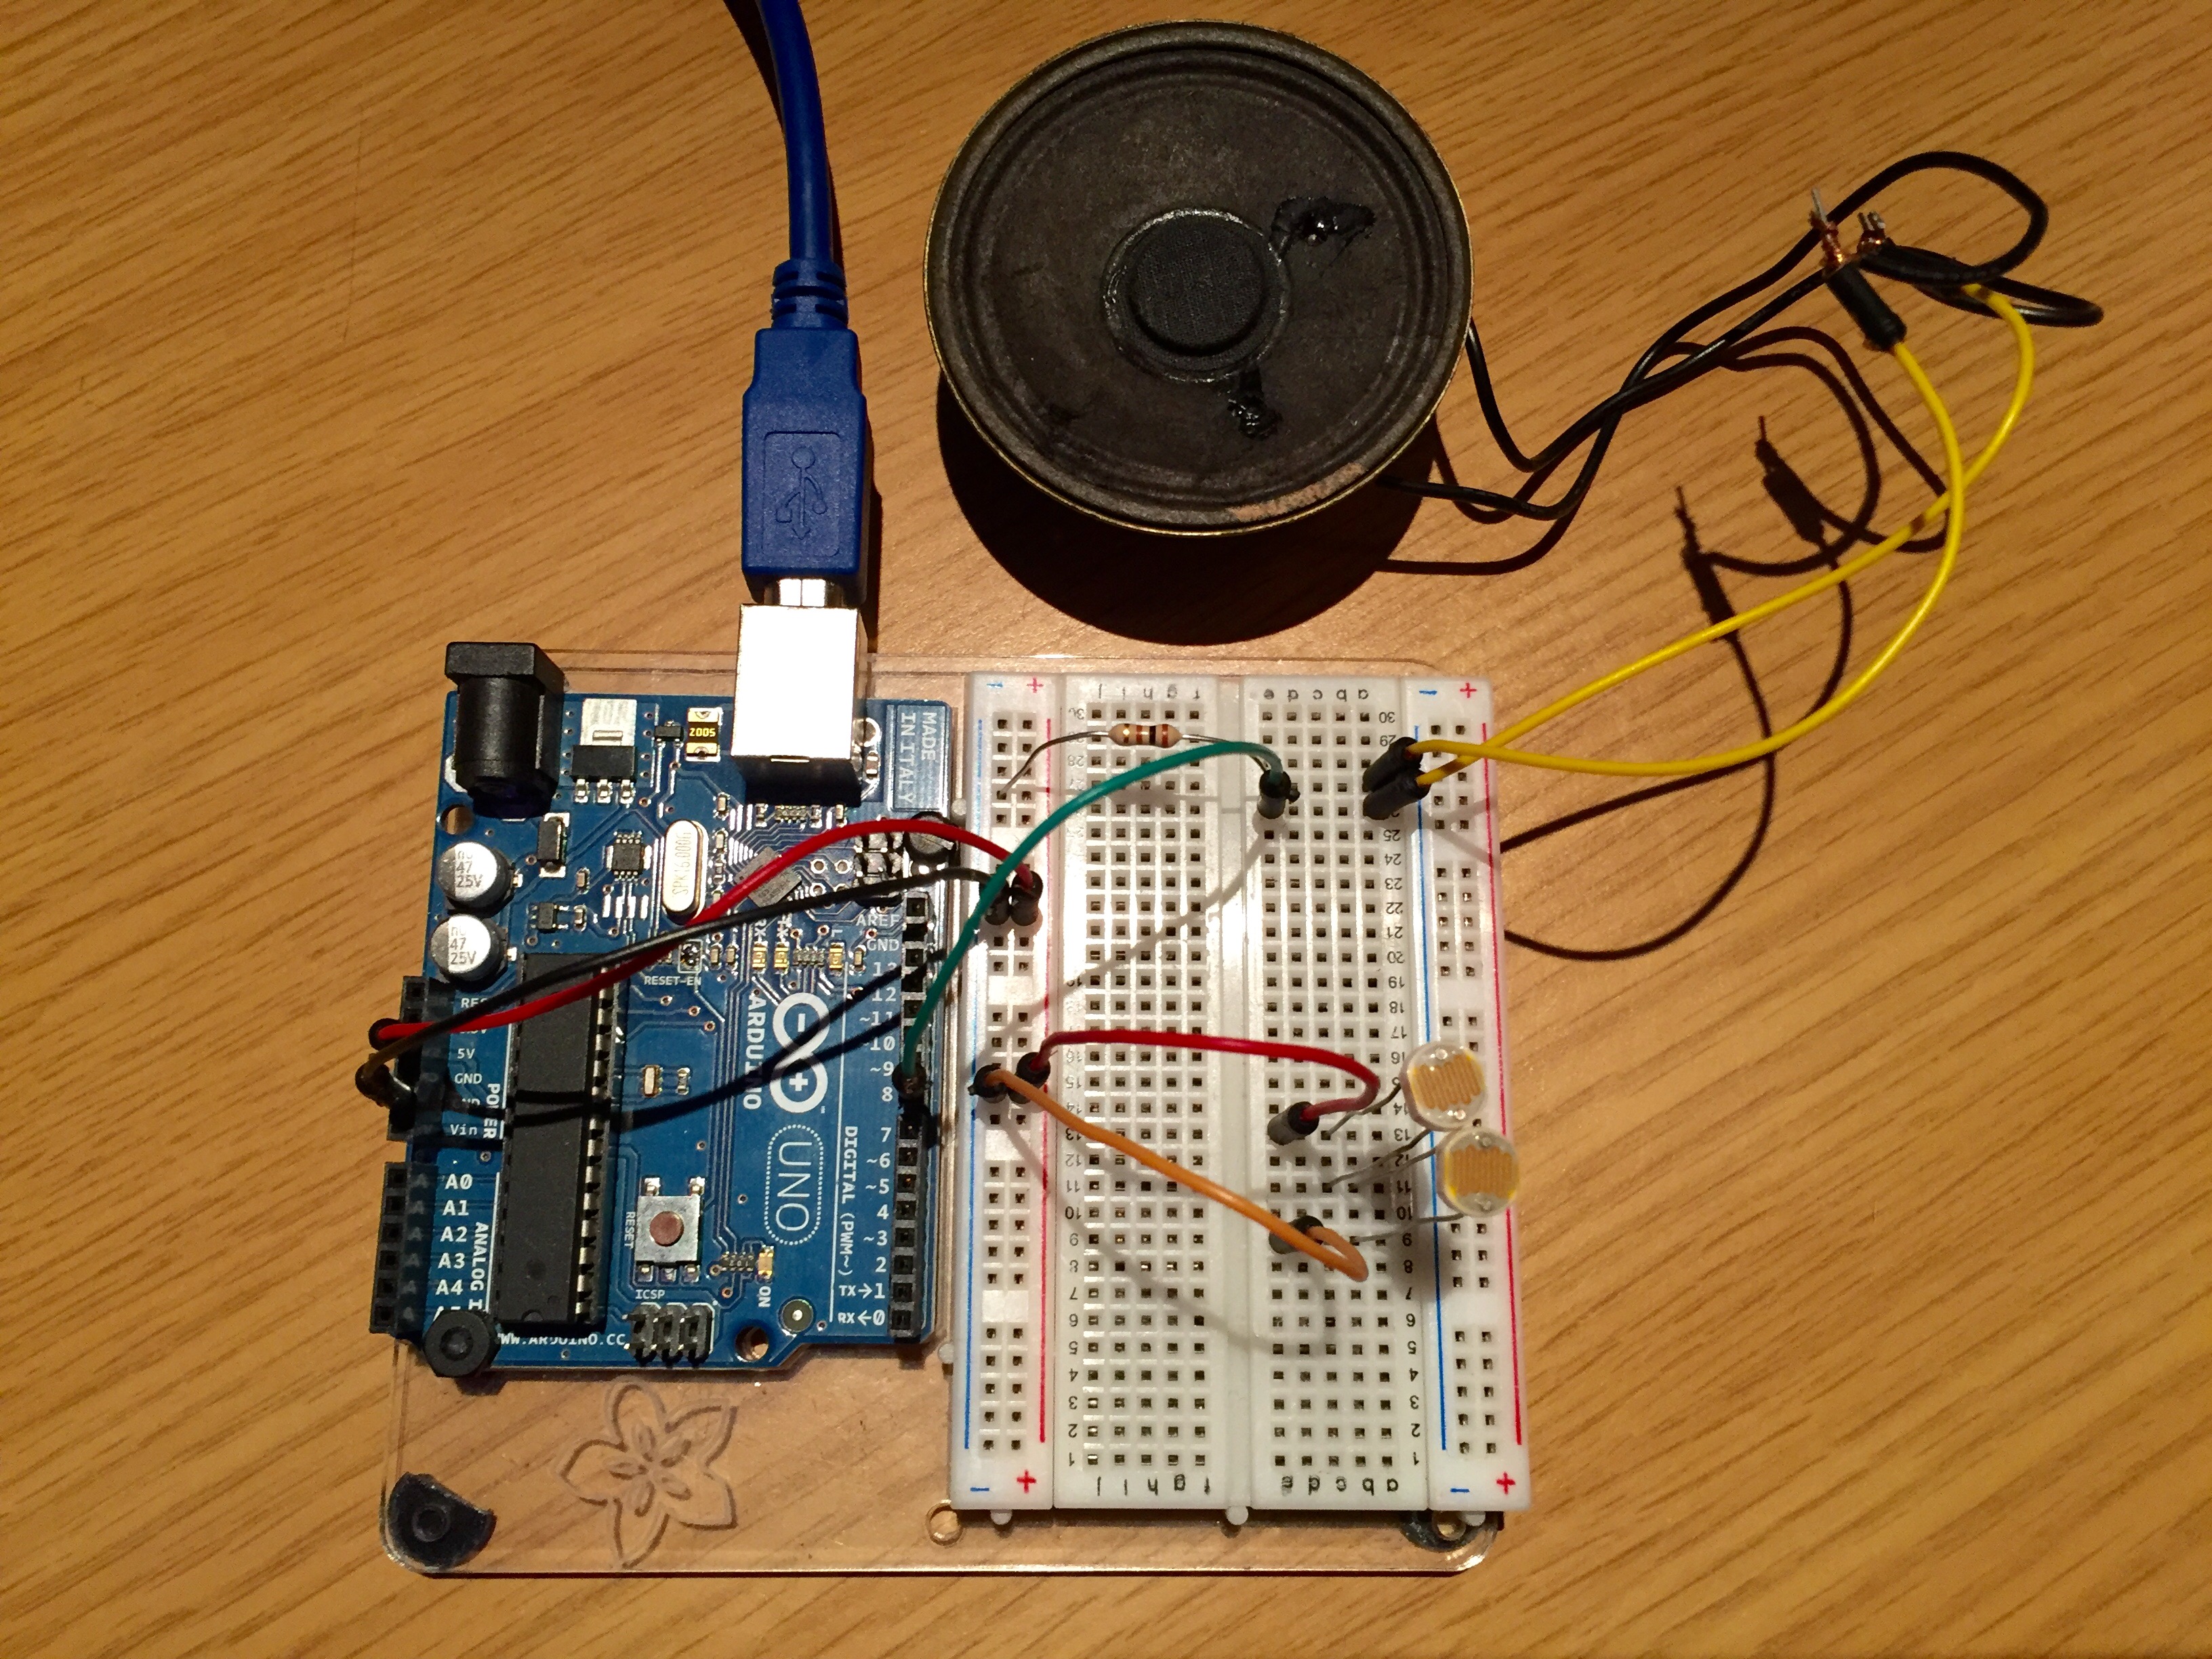
visuals based on sound:

Screen Shot 2015-10-27 at 8.46.34 AM


A lot of visuals that our classmates have done come to mind:

Jamie Charry:

http://itp.jcharry.com/category/visual_language/

Screen-Shot-2015-10-12-at-11.00.51-PM

Yao:

http://www.wangxinyao-design.com/?p=110

屏幕快照-2015-09-22-2.49.59-AM

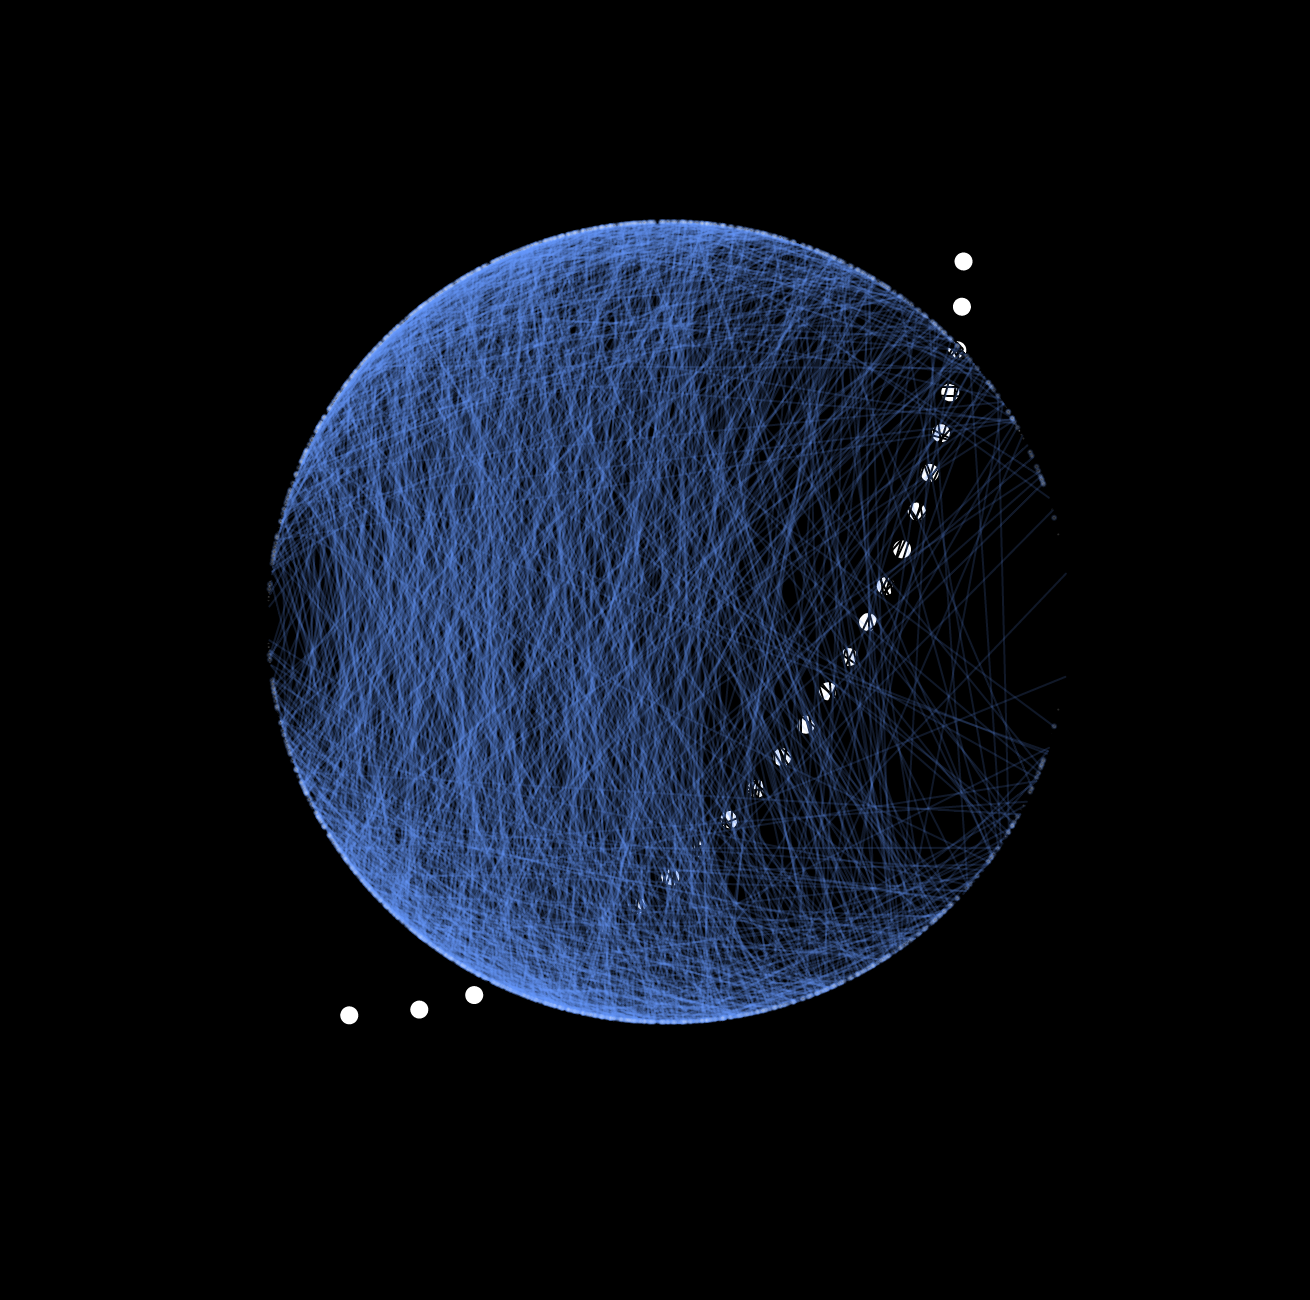
My humble moon that Yao helped me with:

IMG_0945


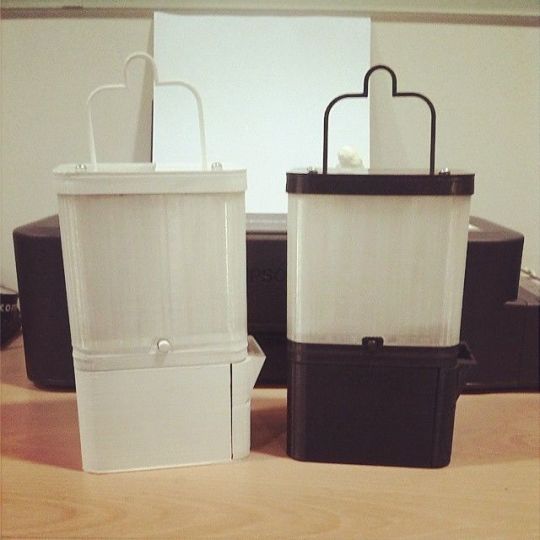
The basis of my idea of interacting with the performer comes from my work restoring a sculpture designed by Robert Rauschenberg. In 2012, I was asked by Trisha Brown Dance Company to restore the electronic set pieces for Astural Converted. The set was composed of eight wireless, aluminum framed towers. Each contains light sensor activated sound and lighting. Designed by Robert Rauschenberg in 1989 and constructed by engineers from Bell Laboratories, the towers turn off and on their lamps based on the performers movements. Each tower also plays a different part of the musical score via individual tape decks. .

Screen Shot 2015-10-28 at 10.54.34 AM

Screen Shot 2015-10-28 at 10.54.42 AM

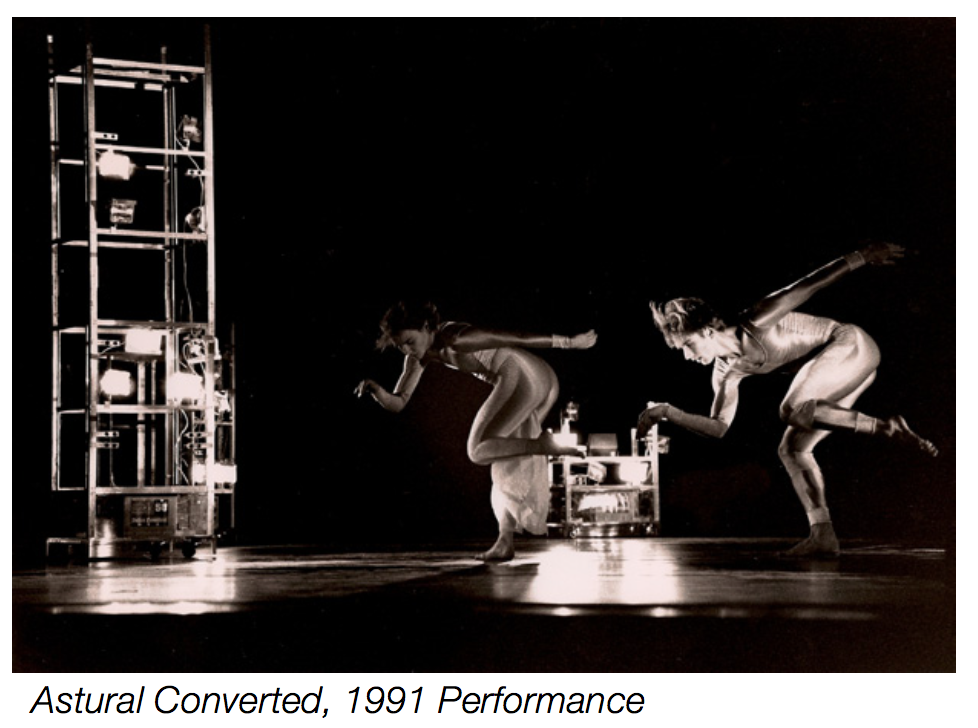
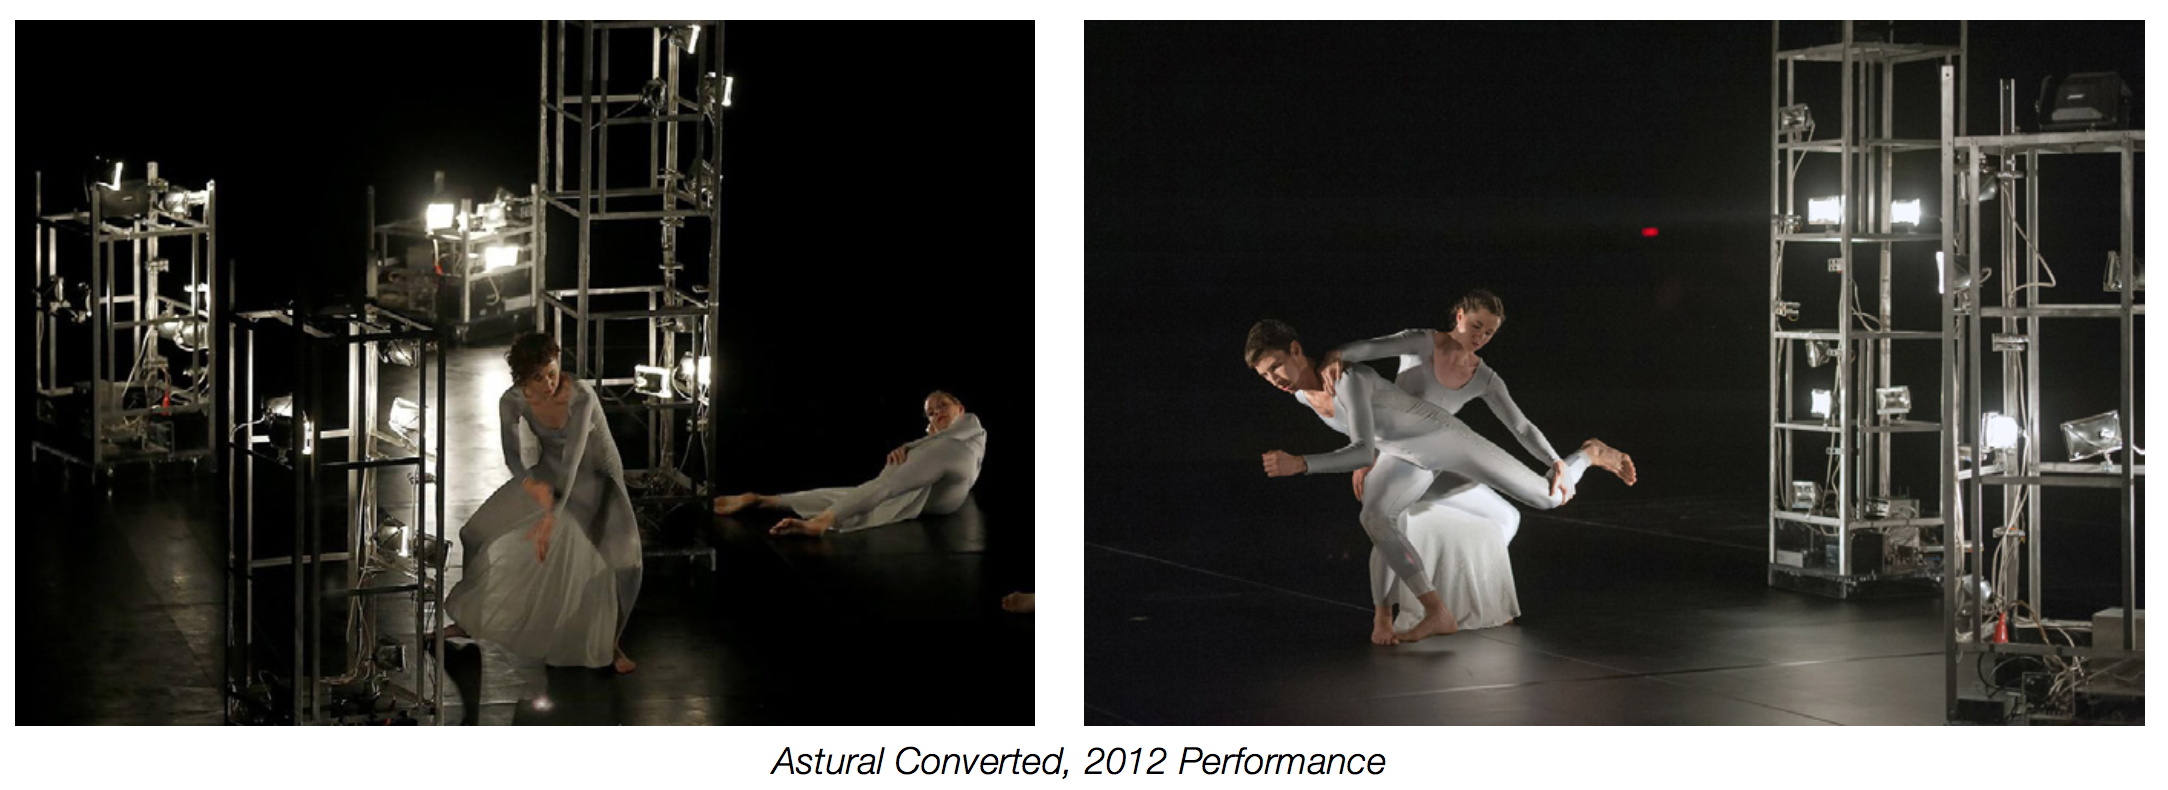
Im excited about taking this idea of car headlights  and tape decks controlled by a dancers movement, and scaling it up to p5 and digital sensors.

Physical Computing – final project ideas

Im now starting to brainstorm some ideas to implement for the physical computing final. Since we only have 4 or 5 weeks to create something, Im hoping to close in on a plan that I can use as a stepping stone for other projects I do here.

As of now I am between two ideas:

  • A portable light and sound device that is used in conjunction with a performance piece
  • An interactive light that is powered by salt water and is made predominately of reusable / biodegradable materials

The portable performance piece idea I have is most certainly a borrowed one. In 2011 and 2012, I worked on restoring a sculpture developed by Robert Rauschenberg and Bell Labs engineer Billy Kluver. Completed in 1989, they created eight battery powered towers on wheels that lit and produced sound for a dance piece choreographed by Trisha Brown. Both sound and light were controlled by the dancers movement.

Screen Shot 2015-10-28 at 10.54.34 AM

Screen Shot 2015-10-28 at 10.54.42 AM

My idea is to produce a similar portable device or set of devices that create light and sound for a performance piece. In the 1980’s, Rauschenberg’s sculptures certainly had a more futuristic feeling to them than they did in 2012. I think it would be great to take this concept and give it a more modern feel, or at the very least use more contemporary components than photocells, car headlights, and cassette decks. An important part of this project for me would be to make it as portable as possible, while still remaining as scaleable as possible.


My second idea is very different! I have been working on a light operated by saltwater for a few years. My concept for this is rooted in developing a light that can be used by anyone in the world, anywhere in the world that saltwater is available. There are several lanterns and kickstarter projects that operate on saltwater:

51xogt40RBL

i2zva2xeqzm1fknjx3gn


My plan would be to utilize the saltwater battery part, but add an interactive element to it, use materials other than plastic, and keep its internal components as simple as possible. I want my project to produce more than simple utility light. It needs to be fun as well. Working with materials that are friendly to the environment is also an important part.


Hipster Oscilloscope

This week I used the p5 sound library to map an oscilloscope to the microphone on my computer. This came after a week of frustration trying to work with RGB pixel tape and p5. I definitely need some more time to get that working! I decided learning about routing sound in p5 would be a good fall back.

The code used the waveform generator in the p5 sound library to draw three waveforms:

By toggling a DOM button, you can switch between two visualizations.

Screen Shot 2015-10-27 at 8.46.25 AM

Screen Shot 2015-10-27 at 8.46.34 AM

The slider controls the volume / amplitude.

Here is the sketch:

http://www.aaronparsekian.com/projects/oscilloscope/

RGB proximity candle

For the midterm Jarrett and I made an LED candle that is controlled with a proximity sensor. The proximity sensor controls the hue of the RGB led, and via serial over bluetooth it controls the volume of a sound file in p5.

Here is an initial test:

IMG_1141

Here is the code on the arduino:

The function that I used to convert hue as one value to RGB is very elegant. It was written by Harley Pebley and can be found here: http://www.skylark-software.com/2011/01/arduino-notebook-rgb-led-and-color_21.html

And here is the p5 sketch used to control the sound via serial:


p5 serial RGBW candle

This week we worked with DOM libraries in p5. I decided to use four DOM sliders to control a 40Watt RGBW LED by outputting serial from p5 into an arduino.

The code to do this took a lot of trial and error on the serial side. The outputs from the four sliders are made into a serial string, then parsed in the arduino code to four analog outputs.

Here is the p5 code:

and the Arduino code:

The sketch is very simple looking 🙂

Screen Shot 2015-10-16 at 11.05.21 AM

I mounted the RGBW LED to an old pentium II heatsink, and connected the four anodes to the arduino’s analog outputs through four TIP120 transistors.

IMG_1106

IMG_1105

IMG_1103


Color Composition

This week we explored color. We were asked to make a composition using color. I started out by taking the hue test:

Screen Shot 2015-10-08 at 10.41.53 PM

I wonder if I would do any better with my calibrated monitor at home?

Next I decided I wanted to do some physical control to manipulate the hue, saturation, and brightness of my ‘composition’  – since it would be very related to how I want to use my programming knowledge as a lighting designer.

I started out by trying to use some addressable LED tape that I had. This turned very frustrating very quickly. The library used to control this tape is no cake-walk, and I found myself in over my head after two days of messing with it.

I turned to a slightly simpler route and used p5 and an arduino to change the H/S/B of some squares on screen via a slider and two knobs.

IMG_1081


Here are some of the outputs:

ss3


ss2


ss1

And a video:

Working with serial

This week we started working with the Arduino and serial.

Here I have two potentiometers and a push button:

FullSizeRender 3

Using one sensor, I uploaded the example code to display the sensor value in different ways:


Screen Shot 2015-10-13 at 2.49.27 PM

We learned how to write to three sensors and view the data in the serial monitor:

Screen Shot 2015-10-13 at 2.53.15 PM

Next we learned how to use the arduino to send values from an analog sensor via serial to the p5 IDE.

My favorite friend the sliding 10K pot:

FullSizeRender

The arduino code to write the single sensor value in binary to serial is pretty simple:

Screen Shot 2015-10-13 at 2.14.18 PM

Here is the p5 sketch working with it. It is printing the serial value as text:

Screen Shot 2015-10-13 at 2.01.50 PM

Next I mapped this data into a graph:

Screen Shot 2015-10-13 at 2.06.08 PM


It was really exciting to get the two potentiometers and the push button to talk to p5 at the same time via serial:

Screen Shot 2015-10-13 at 4.57.55 PM

4th Assignment – Business cards

This week we designed business cards for ourselves. I decided early-on that I wanted to do something simple. Since our typography class I have taken a liking to Futura and how my name looks set in it.

FullSizeRender 6

I also checked out Kandinsky’s book on composition. It was an interesting read, but some of it came off as drawing meaning out of thin-air. Mel Brooks comes to mind!

Back to the business card – I found myself working in circles quite a bit on this one. I decided to use my logo from the previous week, along with icons of light bulbs that I found on thenounproject.com which I then modified. The original icons were designed by Eli Ratus (https://thenounproject.com/mordarius/collection/light-bulb-socket-standards/)

I tried quite a few different designs!

IMG_1045 2

I ended up with inkjet prints on matte presentation paper that I cut out and folded in half.

IMG_1047


Here is the finished product for now:

biz_card3


Assignment #4 – Analog outputs with the arduino

This weeks lab covered interfacing the Arduino with servo motors and speakers. The servo lab basically involves mapping the range of an analog input (variable resistor) to the servo motors full rotation.

FullSizeRender 5

The tone lab uses the tone library in Arduino to map an analog input to a frequency range on the speaker.

FullSizeRender 4

I decided now would be a great time for me to use this nintendo DS touchscreen that I had lying around. Sparkfun has some great information on how to use this screen. Basically it is two variable resistor arrays. One for X values and one for Y values.

bussbarslarge

I found some code by John Boxall very helpful. (http://tronixstuff.com/2010/12/29/tutorial-arduino-and-the-ds-touch-screen)  He explains how to alternate pins between analogWrite and analogRead in order to get the touch screen to work on its four connections.

I decided to map the touch screen to four sections, similar to what we learned in ICM early on with p5.js.

I used these four sections to toggle between four colors. Here is the final product: